
Every October, I find myself obsessed with turning the mundane into the marvelous. These Halloween Witch Finger Cookies are my latest obsession, inspired by tales of enchanted forests and fairy tales gone eerily right. The subtle, spiced aroma that wafts up as they bake—like a whisper of autumn woods—makes my kitchen feel like a gingerbread spell zone.
What makes these cookies truly special is their story of chaos turned charm. Forget perfect, these are quirky, imperfect, and packed with character. Every crooked finger and marbled fingernail is a tiny badge of hope and humor amidst the spooky season’s hustle and bustle.
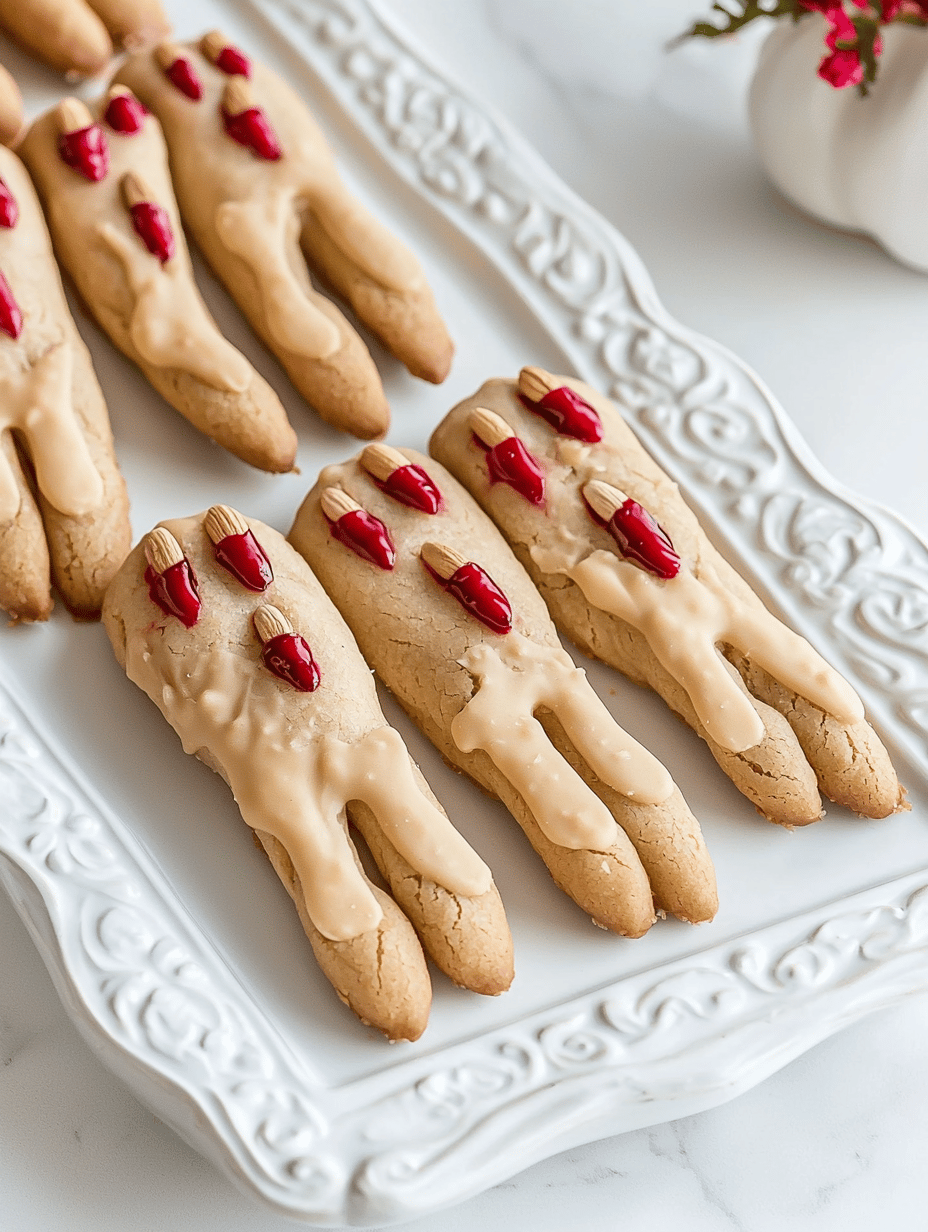
Halloween Witch Finger Cookies
Ingredients
Equipment
Method
- Cream the softened butter and sugar together in a mixing bowl until the mixture is light and fluffy, and smells sweet and buttery.
- Add the egg and vanilla extract to the creamed mixture, beating until fully incorporated and smooth.
- Gradually mix in the sifted flour, cinnamon, ginger, and cloves, stirring until a stiff dough forms that just comes together.
- Divide the dough into two equal portions. Color one portion with a few drops of red food coloring and swirl lightly with the uncolored dough to create a marbled effect.
- Preheat your oven to 350°F (175°C). Line a baking sheet with parchment paper and set aside.
- Take small pieces of dough and roll them into slender, finger-length shapes, about 3-4 inches long, twisting them slightly to mimic knuckles and crooked fingers.
- Use a small knife to gently score knuckle lines and create subtle cracks on the surface to give a realistic, aged look.
- Place the shaped cookies on the prepared baking sheet, spacing them apart to prevent sticking as they expand slightly while baking.
- Bake in the preheated oven for about 15 minutes, or until the cookies are golden and have cracked open in spots, revealing their spooky, finger-like appearance.
- Remove the cookies from the oven and let them cool slightly on a wire rack; the surfaces will firm up to create a crunchy, textured exterior.
- Optionally, add tiny marbled, painted fingernails with a small brush using red and white food coloring for extra detail and creepiness.
Notes
As the evening shadows lengthen, these sinister little treats turn into the perfect party charm. They invite giggles, gasps, and a little bit of messy magic to your Halloween table. The stories they inspire seem almost as delicious as their cinnamon scent.
Crafting these cookies might spark some chaos, but that’s part of the fun. They’re a sweet reminder that sometimes, imperfections make the best memories—just like the best costume mishaps or the last-minute glow sticks. Happy haunting, and may your kitchen always smell of cinnamon and mischief.