Category: Desserts

  • Bewitching Halloween Witch Finger Cookies That Spook and Delight

    Bewitching Halloween Witch Finger Cookies That Spook and Delight

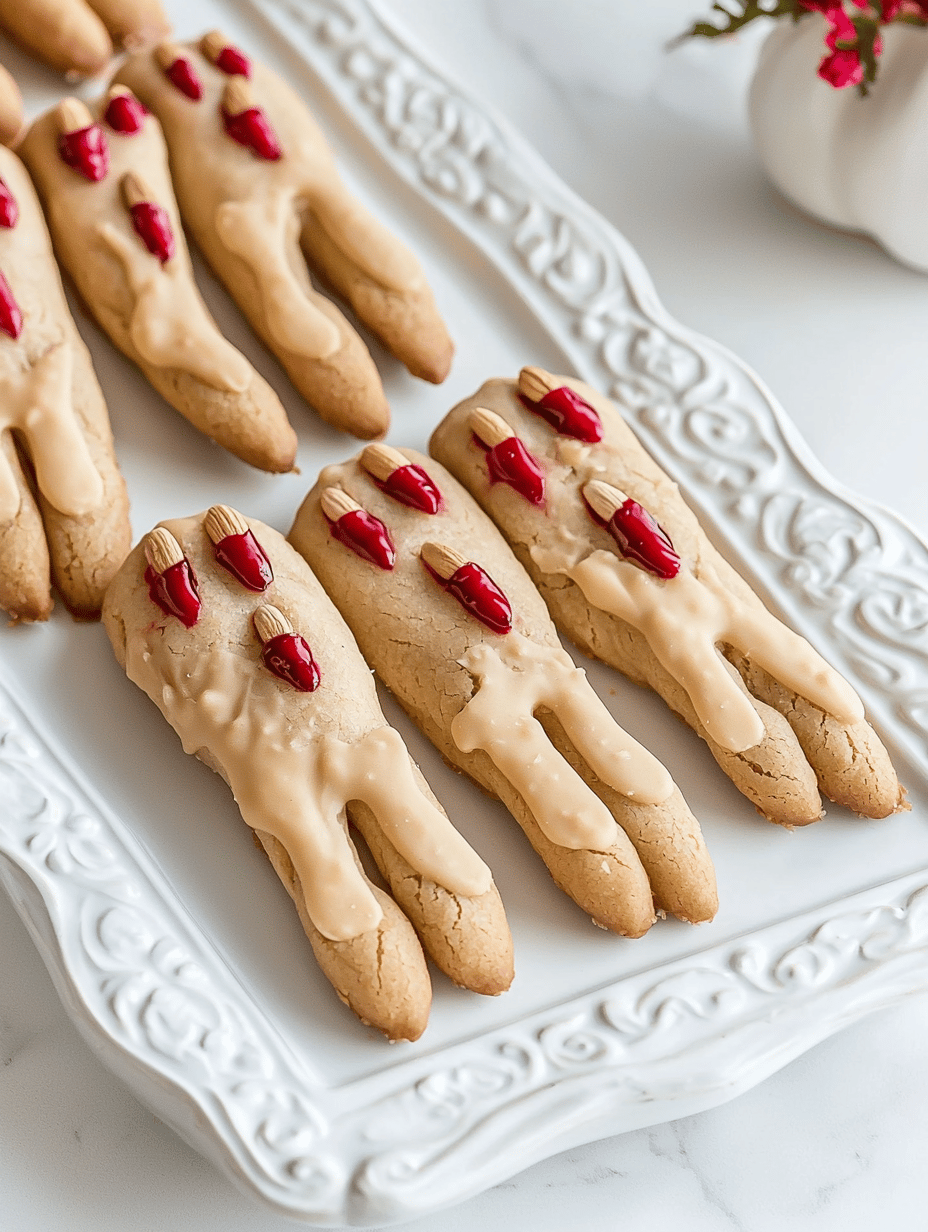
    Every October, I find myself obsessed with turning the mundane into the marvelous. These Halloween Witch Finger Cookies are my latest obsession, inspired by tales of enchanted forests and fairy tales gone eerily right. The subtle, spiced aroma that wafts up as they bake—like a whisper of autumn woods—makes my kitchen feel like a gingerbread spell zone.

    What makes these cookies truly special is their story of chaos turned charm. Forget perfect, these are quirky, imperfect, and packed with character. Every crooked finger and marbled fingernail is a tiny badge of hope and humor amidst the spooky season’s hustle and bustle.

    Halloween Witch Finger Cookies

    These witch finger cookies are crafted from a spicy, buttery dough shaped into twisted, finger-like forms with marbled fingernails, baked until golden and slightly cracked. Their irregular shapes and textured surfaces create a spooky, realistic appearance, perfect for Halloween celebrations.
    Prep Time 20 minutes
    Cook Time 15 minutes
    Total Time 35 minutes
    Servings: 12
    Course: Main Course
    Cuisine: Halloween
    Calories: 150

    Ingredients
      

    • 1 cup unsalted butter softened
    • 1 cup granulated sugar
    • 1 large egg at room temperature
    • 1 tsp vanilla extract
    • 2 1/2 cups all-purpose flour sifted
    • 1/2 tsp ground cinnamon
    • 1/4 tsp ground ginger
    • Pinch cloves ground
    • A few drops red food coloring for marbling fingernails
    • A few drops white food coloring for marbling fingernails

    Equipment

    • Mixing bowls
    • Baking sheet
    • Parchment paper
    • Small knife
    • Pastry brush

    Method
     

    1. Cream the softened butter and sugar together in a mixing bowl until the mixture is light and fluffy, and smells sweet and buttery.
    2. Add the egg and vanilla extract to the creamed mixture, beating until fully incorporated and smooth.
    3. Gradually mix in the sifted flour, cinnamon, ginger, and cloves, stirring until a stiff dough forms that just comes together.
    4. Divide the dough into two equal portions. Color one portion with a few drops of red food coloring and swirl lightly with the uncolored dough to create a marbled effect.
    5. Preheat your oven to 350°F (175°C). Line a baking sheet with parchment paper and set aside.
    6. Take small pieces of dough and roll them into slender, finger-length shapes, about 3-4 inches long, twisting them slightly to mimic knuckles and crooked fingers.
    7. Use a small knife to gently score knuckle lines and create subtle cracks on the surface to give a realistic, aged look.
    8. Place the shaped cookies on the prepared baking sheet, spacing them apart to prevent sticking as they expand slightly while baking.
    9. Bake in the preheated oven for about 15 minutes, or until the cookies are golden and have cracked open in spots, revealing their spooky, finger-like appearance.
    10. Remove the cookies from the oven and let them cool slightly on a wire rack; the surfaces will firm up to create a crunchy, textured exterior.
    11. Optionally, add tiny marbled, painted fingernails with a small brush using red and white food coloring for extra detail and creepiness.

    Notes

    For an extra creepy effect, slightly crack the surface before baking to enhance the gnarled appearance.

    As the evening shadows lengthen, these sinister little treats turn into the perfect party charm. They invite giggles, gasps, and a little bit of messy magic to your Halloween table. The stories they inspire seem almost as delicious as their cinnamon scent.

    Crafting these cookies might spark some chaos, but that’s part of the fun. They’re a sweet reminder that sometimes, imperfections make the best memories—just like the best costume mishaps or the last-minute glow sticks. Happy haunting, and may your kitchen always smell of cinnamon and mischief.

  • Spooky Delight: Halloween Monster Eyeball Cake Pops

    Spooky Delight: Halloween Monster Eyeball Cake Pops

    The eerie season is upon us, and what better way to celebrate than with a creepy yet adorable treat? These Halloween Monster Eyeball Cake Pops turn your dessert table into a haunting scene straight out of a spooky movie. The best part? They make spooky fun accessible for bakers of all skill levels.

    Imagine strolling into a room filled with the scent of rich vanilla cake and swirls of vibrant icing, each eyeball staring back with a gleam of mischief. These cake pops are a perfect mix of chaos and charm, bringing a touch of carnival horror to your Halloween festivities. They’re quick to assemble but high on impact, making them ideal for any gathering.

    ## WHY I LOVE THIS RECIPE?
    – It lets me channel my inner mad scientist with colorful, gooey eyeballs.
    – Who doesn’t grin at tiny edible monsters staring back at you?
    – They’re surprisingly forgiving and flexible, perfect for last-minute spook-fests.
    – Nostalgic because cookie-cutter Halloween sweets lack this playful, creepy vibe.
    – Makes my party—gore and giggles included—so much more memorable.

    Halloween Monster Eyeball Cake Pops

    These cake pops are made from vanilla cake blended with frosting, formed into small balls, and coated in colorful icing to create creepy yet adorable eyeballs. The final treats have a smooth, glossy exterior with detailed eyeball features, giving a fun and spooky appearance perfect for Halloween festivities.
    Prep Time 30 minutes
    Cook Time 10 minutes
    Total Time 40 minutes
    Servings: 12
    Course: Main Course
    Cuisine: Halloween
    Calories: 150

    Ingredients
      

    • 1 box vanilla cake mix prepared according to package instructions
    • 1 cup vanilla frosting store-bought or homemade
    • 16 oz candy melts or colored chocolate for coating and decorating
    • 12 pieces lollipop sticks
    • optional edible markers or small decorating tips for detailed eyeball features

    Equipment

    • Mixing bowls
    • Stand mixer or hand mixer
    • Baking sheet
    • Cooling rack
    • Lollipop sticks
    • Microwave-safe bowl
    • Small paintbrush or piping bag
    • Candy melts or colored chocolate
    • Food coloring
    • Small decorating tips or edible markers

    Method
     

    1. Crumble the baked vanilla cake into a large mixing bowl, breaking it apart until fine crumbs form.
    2. Mix in the vanilla frosting thoroughly until the mixture becomes dough-like and holds together when pressed.
    3. Bake a batch of vanilla cake, then allow it to cool completely on a cooling rack.
    4. Once cooled, crumble the cake into smaller pieces and mix it into the dough in the bowl.
    5. Using your hands, roll the mixture into 1-inch diameter balls and place them on a baking sheet lined with parchment paper.
    6. Insert a lollipop stick into each ball about halfway through, pressing gently so it stays secure.
    7. Freeze the cake pops for at least 30 minutes until firm, making them easier to coat.
    8. Melt the candy melts or colored chocolate in a microwave-safe bowl, stirring until smooth and shiny.
    9. Dip each cake pop into the melted coating, turning to cover completely, then gently tap off excess coating.
    10. Position the coated cake pop upright to set, and before the coating hardens, add small dots for the irises and veins using colored icing or edible markers.
    11. Allow the decorated cake pops to cool and dry completely until the coating is firm and shiny.
    12. Serve your creepy, colorful eyeball cake pops on a platter for a fun and spooky Halloween treat.

    Notes

    Use bright food colors for a more striking spooky look. Handle the decorating carefully to create detailed eyeball features.
    As the lights dim and you place these eyeball cake pops on your table, the room will fill with a mix of curiosity and delight. Watching guests’ reactions to these creepy confections is almost as fun as making them.

    This recipe is a reminder that Halloween treats don’t have to be complicated or scary to be unforgettable. With just a few ingredients and a little bit of chaos, you can craft something that sparks joy and a little shiver at the same time. Happy haunting—and happy baking!

  • Whimsical Pumpkin Muffins with a Secret Twist

    Whimsical Pumpkin Muffins with a Secret Twist

    Typically, pumpkin muffins are reserved for cozy autumn mornings. But today, I want to share a lesser-known trick to elevate these simple treats—adding a hint of spiced orange zest that transforms each bite.

    Imagine biting into a muffin that unexpectedly whispers of citrus brightness against the earthy pumpkin backdrop. The aroma alone—clove, cinnamon, and fresh orange—can turn any mundane breakfast into a festive occasion.

    What makes this recipe special isn’t just the flavor kick, though. It’s how adaptable it is—perfect for a quick brunch, a family snack, or even a sneaky dessert. Plus, it’s surprisingly forgiving, even for beginner bakers.

    Spiced Orange Pumpkin Muffins

    These pumpkin muffins are baked treats featuring moist, tender crumb with a lightly domed top. They incorporate pureed pumpkin, warm spices, and a hint of orange zest, resulting in a fragrant, visually appealing muffin with a soft interior and slightly crisp edges.
    Prep Time 15 minutes
    Cook Time 20 minutes
    Total Time 35 minutes
    Servings: 12
    Course: Main Course
    Cuisine: American
    Calories: 220

    Ingredients
      

    • 1 ½ cups all-purpose flour
    • 1 cup granulated sugar
    • 1 teaspoon baking soda
    • ½ teaspoon ground cinnamon
    • ¼ teaspoon ground nutmeg
    • ¼ teaspoon ground cloves
    • ½ teaspoon salt
    • 1 cup pureed pumpkin fresh or canned
    • ½ cup vegetable oil
    • 2 large eggs
    • 1 teaspoon vanilla extract
    • Zest of 1 orange orange zest preferably organic

    Equipment

    • Mixing bowls
    • Whisk
    • Muffin tin or paper liners
    • Ice cream scoop or spoon
    • Cooling rack

    Method
     

    1. Preheat your oven to 350°F (175°C) and line a muffin tin with paper liners or lightly grease it.
    2. In a large mixing bowl, whisk together the flour, sugar, baking soda, cinnamon, nutmeg, cloves, and salt until well combined. This helps evenly distribute the spices and leavening agents.
    3. In a separate bowl, combine the pureed pumpkin, vegetable oil, eggs, vanilla extract, and orange zest. Whisk until the mixture is smooth and slightly frothy, about 1-2 minutes.
    4. Pour the wet mixture into the dry ingredients bowl, then gently fold everything together using a spatula or wooden spoon. Mix just until the batter is combined; don’t overmix to keep the muffins tender.
    5. Scoop the batter into the prepared muffin tin, filling each cup about ¾ full. Use an ice cream scoop for even portions and a tidy appearance.
    6. Bake in the preheated oven for 20-25 minutes, or until the muffins are golden brown and a toothpick inserted into the center comes out clean.
    7. Once baked, remove the muffins from the oven and transfer them to a cooling rack. Let them cool for at least 10 minutes—they will be fragrant and still slightly warm to the touch.
    8. Enjoy these moist, spiced pumpkin muffins as is, or serve with a pat of butter for an extra treat. They’re perfect for breakfast, snacks, or even dessert.

    Notes

    Ensure your pumpkin is well-measured for a moist texture. Orange zest adds brightness but is optional if you prefer a more neutral flavor.

    Stumbling upon this pumpkin muffin recipe might just change your baking game. The blend of warm spices with citrus energy feels perfect as the seasons shift, capturing that fleeting autumn glow.

    Enjoy these muffins fresh out of the oven, with a smear of butter or a drizzle of honey. They are a cozy reminder that simple ingredients, with a little twist, can brighten any day.

  • Hidden Cinnamon Secrets in Every Bite: A Unique Apple Cake Journey

    Hidden Cinnamon Secrets in Every Bite: A Unique Apple Cake Journey

    Most apple cakes are familiar, but I decided to take a different path, infusing mine with a hint of cardamom and a dash of sea salt. The aroma of baking apples with warm spices fills the house, reminiscent of chilly autumn mornings. Today, I want to share a story about how a small tweak can turn a basic cake into a memorable experience.

    This isn’t just about apple cake; it’s about creating a moment of nostalgia with an unexpected twist that keeps you guessing. As a baker, I cherish those little discoveries that turn routine recipes into delightful surprises. So, let’s dive into this recipe, crafted for those who crave creative indulgence and comfort.

    Spiced Apple Cake with Cardamom and Sea Salt

    This apple cake combines tender, moist crumb with sliced apples layered within, flavored with aromatic cardamom and a hint of sea salt. The cake is baked until golden brown, with a fragrant, spiced aroma and a slightly crisp top, showcasing soft inner layers and a rustic appearance.
    Prep Time 20 minutes
    Cook Time 50 minutes
    Total Time 1 hour 10 minutes
    Servings: 8
    Course: Main Course
    Cuisine: baking
    Calories: 250

    Ingredients
      

    • 2 cups all-purpose flour sifted
    • 1 cup granulated sugar
    • 1/2 cup unsalted butter melted
    • 3 large eggs
    • 1 teaspoon ground cardamom
    • 1/2 teaspoon sea salt
    • 1 teaspoon vanilla extract
    • 2 large apples preferably tart, peeled and sliced

    Equipment

    • Mixing bowls
    • Whisk
    • Measuring cups and spoons
    • 9-inch cake pan
    • Rubber spatula
    • Bread knife

    Method
     

    1. Preheat the oven to 350°F (175°C) and grease your cake pan to prevent sticking.
    2. In a large mixing bowl, whisk together the sifted flour, granulated sugar, ground cardamom, and sea salt until evenly combined.
    3. Add the melted butter, eggs, and vanilla extract to the bowl and whisk until the batter is smooth and slightly creamy, about 1-2 minutes.
    4. Gently fold in the sliced apples, distributing them evenly through the batter with a spatula.
    5. Pour the batter into the prepared cake pan, smoothing the surface with the back of a spatula.
    6. Bake in the preheated oven for about 50 minutes, or until the top is golden brown and a toothpick inserted into the center comes out clean.
    7. Remove the cake from the oven and let it cool in the pan for 10 minutes, then transfer to a wire rack to cool completely.
    8. Slice the cooled cake with a bread knife, revealing tender apple layers inside a fragrant crumb with specks of cardamom.
    9. Serve slices on their own or with a dusting of powdered sugar for a comforting autumn treat.
    This apple cake captures the fleeting essence of fall, with its tender crumbs and fragrant fruit. Perfect for cozy gatherings or a quiet moment alone, it’s a reminder that baking can be both simple and surprising.
    Enjoy every bite, savoring the cinnamon, the salt, and the gentle crack of the crust. It’s more than a dessert; it’s a celebration of those small, joyful changes we bring into our kitchens.

  • Spooky Symphony: Halloween Dirt Cake with Gummy Worms

    Spooky Symphony: Halloween Dirt Cake with Gummy Worms

    As fall creeps in and pumpkins turn to mush, I find myself craving a dessert that combines nostalgia with a touch of chaos. Enter the Halloween Dirt Cake—an edible graveyard where crushed cookies mimic dirt, and gummy worms wiggle their way through a playful landscape.

    This recipe isn’t just about taste, it’s about creating a visual story that makes kids laugh and grown-ups nostalgic. The dark, chocolaty aroma with hints of vanilla and the squishy gummy worms bursting with fruitiness makes every bite a tiny adventure. It’s chaos in a bowl, and I love it.

    WHY I LOVE THIS RECIPE?

    • It sparks childhood memories of digging through the yard for worms, now with a sweet twist.
    • The combination of creamy, crunchy, and chewy textures excites every sense.
    • It’s perfectly imperfect—messy, spontaneous, and endlessly customizable.
    • Sharing this makes me feel like a kid again, giggling at the silly worms.

    AVOID MY DISASTER (You’re Welcome)

    • FORGOT to chill the cream cheese—caused a lumpy mess. Chill early next time!
    • DUMPED too much milk—made the filling runny. Use measured amounts and enjoy the fudgy texture.
    • OVER‑TORCHED the chocolate—smelled burnt, had to start over. Keep heat low and stir constantly.
    • MISSED adding the gummy worms—missed the playful punch. Keep them handy for quick insertion.

    QUICK FIXES THAT SAVE YOUR DAY

    • IF the filling is too firm, whirl in a splash of milk to loosen it.
    • WHEN the crumbs are too dry, mix with a few drops of vanilla extract.
    • SPLASH some warm water on the worms to soften them before inserting.
    • PATCH over a cracked crust with more crushed cookies—no one will notice.
    • SHIELD your melting chocolate with a gentle hand to prevent scorching, filling the air with a rich cocoa scent.

    This dirt cake is the ultimate treat to serve at a spooky gathering. Its interactive, messy charm makes it perfect for kids’ parties or a fun family dessert. The dark chocolate flavor with fruity gummy worms is a delight that captures October’s playful spirit.

    As the season thickens and costumes get dusted off, this recipe feels like a sweet, slightly chaotic celebration of fall. It’s not just about the dessert—it’s about creating a moment of joy and messy memories. The aroma of rich cocoa and warm vanilla fills the room, promising happiness in every bite.

    Halloween Dirt Cake

    This layered dessert combines crushed cookies that resemble dirt with a creamy chocolate filling, topped with gummy worms for a playful touch. The final appearance is a dark, crumbly landscape speckled with colorful, squishy worms, and the texture balances creamy, crunchy, and chewy elements.
    Prep Time 30 minutes
    Cook Time 10 minutes
    Total Time 40 minutes
    Servings: 8
    Course: Main Course
    Cuisine: American
    Calories: 320

    Ingredients
      

    • 1 package chocolate sandwich cookies (like Oreos) crushed into crumbs
    • 8 oz cream cheese softened
    • 1/2 cup granulated sugar
    • 1 tsp vanilla extract
    • 2 cups heavy cream chilled
    • 1 cup milk for loosening the filling if needed
    • Gummy worms gummy worms for decoration and fun inserting

    Equipment

    • Mixing bowls
    • Electric mixer
    • 9×13-inch baking dish
    • Spatula
    • cookie bag or plastic zip-top bag
    • Measuring cups and spoons
    • small saucepan

    Method
     

    1. Place the cookies in a plastic bag and crush them into fine crumbs using a rolling pin or by squeezing and smashing with your hands. Set aside.
    2. In a mixing bowl, beat the softened cream cheese with granulated sugar until smooth and fluffy, about 2-3 minutes. Add vanilla extract and continue to mix.
    3. Slowly pour in the heavy cream while mixing on medium speed, whipping until stiff peaks form and the mixture becomes thick and creamy.
    4. Gently fold in the crushed cookies into the whipped cream mixture until evenly combined, creating a chocolatey, pudding-like filling.
    5. Pour half of the cookie crumb mixture into a 9×13 inch dish, spreading it evenly with a spatula to form the first layer.
    6. Add the remaining mixture on top, smoothing out the surface until the top is flat and even.
    7. Refrigerate the assembled dirt cake for at least 2 hours or until well chilled and set.
    8. Once chilled, top the cake with additional crushed cookies to mimic fresh dirt. Place gummy worms randomly on top, pressing them slightly into the surface for a playful look.
    9. For easier insertion, soften the gummy worms slightly by splashing them with warm water if they feel stiff.
    10. Serve the dirt cake in slices, revealing the layers of chocolate crumbs and the fun gummy worms peeking through the top.
    11. Enjoy the playful, messy flavor of this spooky dessert, perfect for Halloween festivities or a fun family treat!

    Notes

    Keep the cream cheese and heavy cream chilled before mixing for the best texture. Feel free to add more gummy worms or other candy decorations for extra fun.

    This Halloween dessert is more than just a clever presentation—it’s a reminder to embrace the chaos and have fun in the kitchen. Each scoop reveals a little more of the playful, spooky landscape we’ve built inside the bowl. Sharing it brings a guilty grin and a quick trip down memory lane.

    As the season winds down, I’ll keep making this dirt cake, delighting in the giggles and the gooey, chocolaty goodness. It’s a simple, satisfying way to add a splash of fun and a dash of nostalgia. No matter how the night turns out, this dessert will always have a special place in my spooky celebrations.

  • Spooktacular DIY: Unforgettable Halloween Ghost Brownies

    Spooktacular DIY: Unforgettable Halloween Ghost Brownies

    Halloween is all about embracing the spooky spirit, but what if your treats could add an extra layer of charm and chaos? These Ghost Brownies aren’t just adorable; they whisper secrets of nostalgic childhood masquerades with a hint of chaos in every bite. Crafting them turns into a playful adventure that lets your creativity run wild amidst the candy chaos.

    Imagine the aroma of rich cocoa mingling with the crispness of freshly whipped frosting, each ghost face emerging from your baking station like tiny specters ready to surprise. It’s a perfect project to involve the little ghouls and goblins in your house, fostering giggles and maybe a little ghostly mischief. The best part? They disappear faster than you can say “Boo!” at your Halloween party.

    Ghost Brownies

    Ghost Brownies are fudgy chocolate treats topped with vanilla frosting and decorated with chocolate or candy eyes to resemble cute or spooky ghost faces. They feature a moist, dense brownie base with a creamy frosting surface, decorated for Halloween festivities. The assembly involves baking the brownies, spreading frosting, and creating ghost faces for a fun, festive look.
    Prep Time 20 minutes
    Cook Time 25 minutes
    Total Time 45 minutes
    Servings: 12
    Course: Main Course
    Cuisine: Halloween
    Calories: 150

    Ingredients
      

    • 1 box brownie mix plus ingredients called for on box, e.g., eggs, oil, water
    • 1 cup butter or margarine for frosting
    • 2 cups powdered sugar for frosting
    • 2 tablespoons milk for frosting
    • 1 teaspoon vanilla extract for frosting
    • Candy eyes or small chocolate chips for decorating the ghost faces optional but for authentic effect

    Equipment

    • Mixing bowls
    • Whisk
    • Rectangular baking pan
    • Parchment paper
    • Spatula
    • Piping bag or plastic sandwich bag
    • Candy eyes or small chocolate chips

    Method
     

    1. Preheat your oven to 350°F (175°C) and line your baking pan with parchment paper for easy removal.
    2. Mix the brownie box ingredients according to the package instructions in a large bowl until smooth and glossy, releasing a rich cocoa aroma.
    3. Pour the batter into the prepared pan, spreading it evenly with a spatula to create a smooth surface.
    4. Bake for about 25 minutes or until a toothpick inserted into the center comes out with just a few moist crumbs. Let the brownies cool completely in the pan before handling.
    5. While the brownies cool, prepare the frosting by beating softened butter with powdered sugar, milk, and vanilla extract until creamy and fluffy, about 3-5 minutes.
    6. Spread the vanilla frosting evenly over the cooled brownies with a spatula, creating a smooth, white surface for the ghost faces.
    7. Fill a piping bag or plastic sandwich bag with the frosting and pipe small ghost shapes or faces onto the decorated brownies.
    8. Add candy eyes or chocolate chips onto each ghost face to give them an expressive, spooky look.
    9. Let the decorated brownies sit for about 10 minutes to set the frosting, then cut into squares and serve your adorable ghost treats.

    These ghostly treats are a fantastic way to bring a touch of whimsy to your Halloween spread, blending nostalgia with creative chaos. They’re perfect for quick parties or a fun weekend project that everyone remembers. Each bite is a burst of cocoa and sweet frosting—little edible ghosts that sparkle with personality.

    As the season deepens, these brownies serve as a charming reminder: Halloween isn’t just about scares, it’s about celebrating the magic of mischief and homemade delights. There’s something special in every crumb and every giggle shared over these ghostly confections, making your holiday uniquely memorable.

  • Beware the Toxic Charm: Spooky Halloween Poison Toffee Apples

    Beware the Toxic Charm: Spooky Halloween Poison Toffee Apples

    Halloween is the perfect time to indulge in treats that combine nostalgia with a twist of the macabre. This year, I decided to dive deep into the darker side of confectionery with Poison Toffee Apples, a creepy yet irresistible treat that looks like a sweet nightmare. The secret lies in a daring black caramel coating that glistens like a poisoner’s potion, tempting everyone at the party.

    Biting into one of these apples is like biting into a storybook spell gone slightly wrong. The glossy, dark toffee crackles with a satisfying snap, releasing a whisper of caramelized sugar aroma that mingles with the crisp apple inside. It’s a bold departure from classic Halloween sweets and a perfect way to surprise guests with something truly unconventional.

    Poison Toffee Apples

    Poison Toffee Apples are whole apples coated in a glossy, black caramel layer that crackles when bitten. The toffee is made by caramelizing sugar and extending it into a dark, shiny coating that forms a firm, brittle shell around the crisp apple. The finished treat has a striking dark appearance with a satisfying snap and a chewy, caramelized outer layer.
    Prep Time 15 minutes
    Cook Time 20 minutes
    Total Time 35 minutes
    Servings: 6
    Course: Main Course
    Cuisine: Halloween
    Calories: 210

    Ingredients
      

    • 6 small or medium apples preferably tart varieties like Granny Smith
    • 2 cups granulated sugar for caramelizing
    • 1/4 cup water to dissolve the sugar
    • 2 tablespoons light corn syrup helps prevent crystallization
    • 1/4 teaspoon black gel food coloring for the dark color
    • 1 tablespoon unsalted butter to add sheen and prevent sticking

    Equipment

    • Apple corer or knife
    • Heavy-bottomed saucepan
    • Candy thermometer
    • Baking sheet lined with parchment paper
    • Wooden spoon or heatproof spatula
    • Skewer or candy apple stick

    Method
     

    1. Wash the apples thoroughly and insert a skewer or candy apple stick into the stem end of each apple. Set them aside on a parchment-lined tray.
    2. Combine the sugar, water, and corn syrup in a heavy-bottomed saucepan over medium heat. Stir gently until the sugar dissolves completely and the mixture begins to simmer.
    3. Attach a candy thermometer to the side of the pan and cook the sugar syrup without stirring until it reaches 300°F (hard crack stage). Watch for a deep amber color and a steady bubbling sound.
    4. Once at temperature, remove the pan from heat immediately and carefully stir in the butter until melted. Add the black gel food coloring and stir until the color is evenly mixed, creating a dark, glossy syrup.
    5. Dip each apple into the hot caramel, tilting and swirling to coat evenly. Let any excess drip off, then place the coated apple onto the prepared parchment paper.
    6. Repeat the dipping process with all apples, working quickly before the caramel cools and hardens.
    7. Allow the coated apples to cool completely at room temperature until the caramel shell is firm and glossy, about 15-20 minutes.
    8. Once cooled, gently tap the apples to reveal a crispy, crackling shell and a shiny black finish.
    9. Serve the Poison Toffee Apples whole, with their dark, brittle coating ready to crack with each bite.

    Notes

    Work carefully when handling hot caramel, and keep a container of water nearby in case of hot splashes or burns.
    As the night falls and the shadows grow longer, these Poison Toffee Apples will cast a delicious spell on your Halloween celebration. They’re not just a treat — they’re a conversation starter, a moment of chaos wrapped in sugar and good old spooky fun. With a little creativity, these apples turn simple ingredients into a memorable grim delight.

    So go ahead, embrace the chaos, and let your Halloween be a little more wicked. These apples are a reminder that sometimes, the best treats are the ones with a little bit of danger and a lot of attitude.

  • Spooky Sweetness: Halloween Graveyard Pudding Cups

    Spooky Sweetness: Halloween Graveyard Pudding Cups

    Imagine digging into a mini graveyard of creamy pudding, complete with chocolate tombstones and candy gravestones. These Halloween Graveyard Pudding Cups transform ordinary desserts into a spooky, playful treat that’s as fun to make as it is to eat. Perfect for kids and adults alike, they add a dash of chaos and nostalgia to your spooky season. The scent of rich chocolate and vanilla, combined with crunchy treats, creates an irresistible aroma that pulls everyone into the Halloween spirit.

    Halloween Graveyard Pudding Cups

    This dessert features creamy chocolate pudding layered with crunchy crushed cookies, decorated with chocolate tombstones and candy gravestones to resemble a spooky graveyard. The final presentation includes layered textures of smooth pudding, crumbly cookies, and decorative treats, creating a playful and visually striking Halloween-themed dessert.
    Prep Time 20 minutes
    Cook Time 10 minutes
    Total Time 30 minutes
    Servings: 6
    Course: Main Course
    Cuisine: American
    Calories: 250

    Ingredients
      

    • 1 box vanilla pudding mix instant variety
    • 2 ½ cups whole milk
    • 1 cup granulated sugar for the cookie crumble
    • 1 cup all-purpose flour for the cookie crumble
    • ½ cup unsweetened cocoa powder for the cookie crumble
    • ½ cup butter melted
    • 1 cup crushed chocolate cookies for layering and decoration
    • 6 chocolate tombstones or candy gravestones decorative toppers for the spooky graveyard effect

    Equipment

    • Mixing bowls
    • Whisk
    • Small spatula
    • Serving cups or small containers
    • Cookie sheet
    • Plastic bags or piping bags
    • Graveyard decorations (chocolate tombstones, candy gravestones)

    Method
     

    1. Prepare the pudding: whisk the vanilla pudding mix into 2 cups of cold milk in a mixing bowl until smooth and slightly thickened, then refrigerate for about 10 minutes to set.
    2. Meanwhile, make the cookie crumble: combine flour, cocoa powder, sugar, and melted butter in a bowl, then mix until crumbly and evenly coated.
    3. Spread the cookie crumble onto a baking sheet and bake in a preheated oven at 350°F (175°C) for about 8-10 minutes until fragrant, then let cool.
    4. Once cooled, crumble the baked cookies into small pieces and set aside.
    5. Layer the pudding into individual cups or containers, filling them about halfway.
    6. Sprinkle a generous layer of cookie crumble over the pudding layer for added texture and flavor.
    7. Add another layer of pudding on top of the cookie crumble, then repeat the crumble layer if desired for a tall, spooky effect.
    8. Place a chocolate tombstone or candy gravestone on each cup to resemble a graveyard, pressing gently to set in place.
    9. Finish by adding more cookie crumble around the bases of the tombstones to blend them into the scene.
    10. Chill the completed pudding cups in the refrigerator for at least 1 hour before serving to let flavors meld.
    11. Serve the spooky graveyard pudding cups chilled, with extra decorations if desired for more haunting effect.
    This dessert is a seasonal delight that sparks chatter and giggles around the table. The mix of textures and flavors makes each spoonful a mini adventure through a creepy, delicious landscape. It’s not just a treat—it’s a memorable centerpiece for your Halloween festivities, blending joy, chaos, and a little bit of spooky charm in every cup.

  • Spiced Pumpkin Cookies: A Cozy Autumn Secret

    Spiced Pumpkin Cookies: A Cozy Autumn Secret

    As the air turns crisp and the leaves begin to crunch beneath our feet, I find myself craving the comforting aroma of baked goods that evoke fall’s essence. This pumpkin cookies recipe isn’t just about taste; it’s about capturing the spirit of autumn in every bite. Using only pantry staples, these cookies transform simple ingredients into a nostalgic treat with a surprising depth of flavor.

    When I first discovered this recipe, it felt like unearthing a hidden treasure — the perfect way to celebrate pumpkin season. The scent of cinnamon and nutmeg fills my kitchen, creating a warm, inviting atmosphere. These cookies are not just desserts; they are a small celebration of the fleeting beauty of fall.

    ### WHY I LOVE THIS RECIPE?
    – The aroma of baking spices that makes the house smell like a holiday.
    – The crunch on the edges coupled with a soft, chewy center — a perfect contrast.
    – The simple ingredients that come together quickly, bringing joy even on busy days.
    – The memory of pumpkin patches and cozy sweaters flooding back with each batch.
    – Shareable, snackable, and always a crowd-pleaser amid friends and family.

    Pumpkin Cookies

    These pumpkin cookies combine pantry staples with warm spices, yielding soft centers and slightly crunchy edges. The dough is mixed, shaped, and baked until golden and fragrant, resulting in cookies that are chewy on the inside with a subtle pumpkin flavor and spiced aroma.
    Prep Time 15 minutes
    Cook Time 12 minutes
    Total Time 27 minutes
    Servings: 24
    Course: Main Course
    Cuisine: American
    Calories: 150

    Ingredients
      

    • 1 cup granulated sugar
    • 1/2 cup unsalted butter softened
    • 1 cup canned pumpkin puree
    • 1 large egg
    • 2 cups all-purpose flour
    • 1 teaspoon ground cinnamon
    • 1/2 teaspoon ground nutmeg
    • 1/2 teaspoon baking soda
    • 1/4 teaspoon salt

    Equipment

    • Mixing bowls
    • Baking sheet

    Method
     

    1. In a large mixing bowl, beat together the softened butter and sugar until the mixture is light and fluffy, about 2-3 minutes. The mixture should look smooth and creamy, with a gentle sheen.
    2. Add the egg and pumpkin puree to the butter mixture, mixing well after each addition. Continue until fully incorporated; the batter will become slightly thicker and more homogeneous.
    3. In a separate bowl, whisk together the flour, cinnamon, nutmeg, baking soda, and salt to evenly distribute the spices and leavening agents.
    4. Gradually add the dry ingredients into the wet mixture, folding gently with a spatula or mixing on low speed until just combined. The dough will be soft and slightly sticky but hold together well.
    5. Line a baking sheet with parchment paper and scoop spoonfuls of dough, placing them about 2 inches apart. Use the back of a fork or your fingers to gently flatten each cookie into a disc shape.
    6. Bake the cookies in a preheated oven at 350°F (175°C) for 12-15 minutes, or until the edges are golden and slightly crisp. The centers should remain soft and chewy.
    7. Remove the baking sheet from the oven and let the cookies cool on it for 5 minutes before transferring them to a wire rack. This helps set their shape and makes them easier to handle.
    8. Once cooled, enjoy the cookies either warm or at room temperature, savoring their soft, chewy interior and lightly crispy edges.
    In today’s fast-paced world, it’s nice to have a recipe that reminds us of slower, simpler times. These pumpkin cookies are perfect for crisp mornings or chilly evenings when you want to gather loved ones around. Trust me, the warm spices and subtle sweetness never fail to spark a moment of comfort.

    So, next time the pumpkin craving hits or you want a small edible hug, bake up a batch. Embrace the joy of baking these cookies — they might just become your new seasonal staple. After all, sometimes it’s the little things, like a batch of pumpkin cookies, that make the season memorable.

  • The Secret Ingredient That Elevates Your Peach Crisp

    The Secret Ingredient That Elevates Your Peach Crisp

    Imagine a peach crisp that not only captures the sweet, luscious aroma of ripe peaches but also surprises you with an unexpected hint of garnish that takes it to a whole new level. This dessert is my go-to when I want to impress unexpectedly—no fancy ingredients needed. It’s about revving up simple pantry staples and a handful of fresh peaches into a nostalgic yet novel treat.

    As the seasons change, so do the possibilities for fruit desserts, but there’s something about the classic peach crisp that feels both timeless and playful. Today, I’m sharing a version where a tiny tweak transforms the familiar into something memorable, perfect for gatherings or cozy nights at home.

    Peach Crisp with Garnish

    This peach crisp combines juicy, ripe peaches topped with a crisp, buttery streusel. The dessert is baked until bubbly and golden, creating a warm, tender fruit filling contrasted with a crunchy topping, finished with a decorative garnish for added flavor and visual appeal.
    Prep Time 15 minutes
    Cook Time 35 minutes
    Total Time 50 minutes
    Servings: 4
    Course: Main Course
    Cuisine: American
    Calories: 220

    Ingredients
      

    • 4 cups ripe peaches peeled, pitted, sliced
    • 1/2 cup granulated sugar
    • 1 tablespoon lemon juice to balance sweetness
    • 1 cup all-purpose flour
    • 1/2 cup rolled oats
    • 1/2 cup brown sugar
    • 1/2 cup unsalted butter cold and cubed
    • Pinch salt
    • Optional fresh mint or edible flowers for garnish

    Equipment

    • Mixing bowls
    • Baking dish
    • pastry cutter or fork
    • Oven

    Method
     

    1. Preheat your oven to 350°F (175°C). In a mixing bowl, combine sliced peaches with sugar and lemon juice, tossing gently to coat. Spread the mixture evenly in a baking dish.
    2. In another bowl, make the streusel topping by combining flour, oats, brown sugar, salt, and cold, cubed butter. Use a pastry cutter or fork to cut in the butter until the mixture resembles coarse crumbs.
    3. Sprinkle the streusel evenly over the peaches, covering the surface completely.
    4. Place the baking dish in the preheated oven and bake for about 35 minutes, or until the topping is golden brown and the filling is bubbling around the edges.
    5. Remove from the oven and let it cool slightly. For a decorative touch, sprinkle with finely chopped fresh mint or edible flowers if desired.
    6. Scoop warm portions into bowls, ensuring each serving gets plenty of the luscious fruit and crunchy topping. Enjoy this classic dessert with a twist for a delightful treat.

    Notes

    For extra flavor, add a pinch of cinnamon or vanilla extract to the peach filling.
    This peach crisp isn’t just a dish; it’s a memory waiting to happen. The first bite releases a burst of juicy peaches wrapped in crunchy, buttery topping—pure comfort with a twist.

    Keep it simple and let the natural sweetness shine, or get creative with a sprinkle of toasted oats or a dash of cinnamon. Either way, it’s a reminder that even old favorites can have a little surprise hidden under that crispy topping.