Category: Main Course

  • Spooky Smile: Halloween Monster Burgers

    Spooky Smile: Halloween Monster Burgers

    Halloween is the perfect time to unleash culinary creativity that’s just a little bit mischievous. This year, I decided to turn classic burgers into playful monsters that will make both kids and adults giggle at the dining table. Brightly colored condiments and quirky toppings transform ordinary beef patties into scenes of festive chaos.

    The secret is in the details: googly eyes, jagged cheddar teeth, and spicy ketchup mouths bring these monster burgers to life. Each bite offers a satisfying mix of smoky beef, crispy bun textures, and a playful visual treat. They’re not just a meal—they’re a conversation starter for your Halloween gathering.

    Monster Halloween Burgers

    Monster Halloween Burgers are playful beef patties assembled with colorful condiments and quirky toppings to resemble mischievous monsters. The burgers feature smoky, juicy beef patties, crispy buns, and creatively crafted faces with cheese, condiments, and garnishes, resulting in a visually fun and satisfying main dish with contrasting textures.
    Prep Time 20 minutes
    Cook Time 10 minutes
    Total Time 30 minutes
    Servings: 4
    Course: Main Course
    Cuisine: American
    Calories: 520

    Ingredients
      

    • 1 pound ground beef 80-85% lean for juicy patties
    • 4 buns hamburger buns preferably toasted
    • 4 slices cheddar cheese cut into jagged shapes for monster teeth
    • 1/2 cup ketchup for monster mouths
    • 1/2 cup mustard additional decoration or tongue
    • 1/4 cup mayonnaise for eyeballs or accents
    • 4 pieces cooked carrot cut into eyes or tongues
    • 8 pieces black olives sliced for eyes
    • 4 pieces lettuce leaves for base and garnish

    Equipment

    • Grill or stovetop skillet
    • Spatula
    • Knife
    • Cutting board
    • Baking sheet

    Method
     

    1. Preheat your grill or skillet over medium-high heat, and shape the ground beef into four evenly-sized patties. Season with salt and pepper, then place them on the hot surface. Cook for about 4-5 minutes per side until the patties are nicely browned and cooked through.
    2. While the patties are cooking, prepare the cheese to resemble monster teeth by cutting slices into jagged mini-shapes. Slice black olives into small rounds for eyes, and cut carrot pieces into small strips or circles for tongues or additional features.
    3. Once the beef patties are cooked, place each on a baking sheet, and top with a slice of cheddar cheese. Broil briefly just until the cheese melts and begins to curl slightly around the edges, about 1-2 minutes.
    4. Toast the hamburger buns lightly until golden, then spread a little mayonnaise on the bottom buns for added flavor and stability.
    5. Assemble each burger by placing a lettuce leaf on the bottom bun, then carefully set the beef patty with melted cheese on top. Use ketchup and mustard to draw jagged monster mouths and tongues on the top bun if desired.
    6. Add the decorated features—olive slices for eyes, carrot pieces for tongues or eyebrows, and the jagged cheese for teeth—on top of each burger to create facial monsters. Secure with additional condiments or toothpicks if needed.
    7. Top each burger with the upper bun, pressing gently to set all the festive features in place. Serve immediately to enjoy the fun expressions and textures.
    Creating these Halloween monster burgers isn’t about perfection; it’s about embracing the fun chaos of cooking for a holiday. They add a dash of humor and imagination to your feast, making the event memorable. Plus, they’re surprisingly simple to assemble, giving you more time to enjoy the spooky night with your loved ones.

  • Spooky Delight: Crafting the Perfect Halloween Mummy Pizza

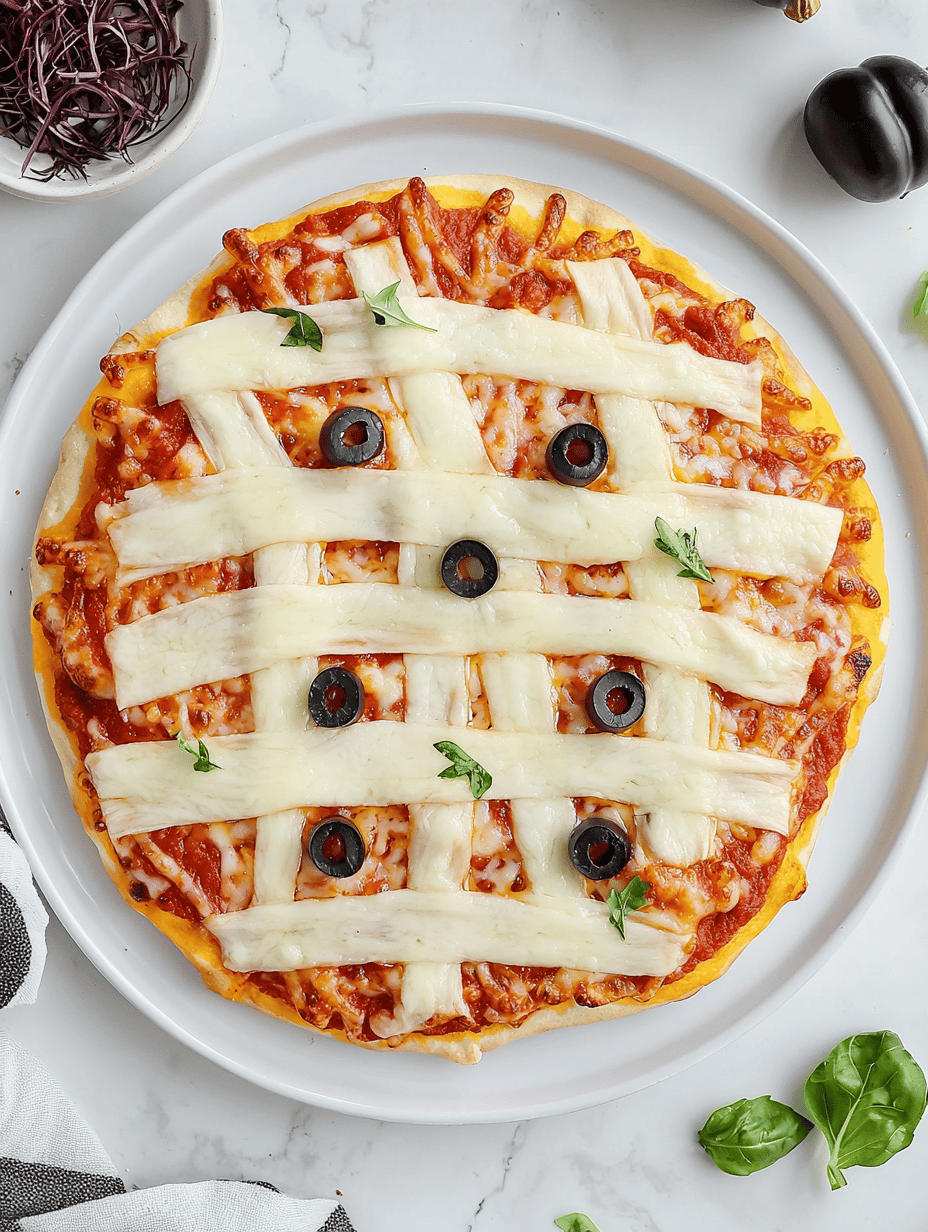
    Spooky Delight: Crafting the Perfect Halloween Mummy Pizza

    Every October, my kitchen becomes a mad scientist’s lab, transforming simple ingredients into ghostly, ghoulish creations. This year, I discovered a way to combine playful horror with comforting flavors through my Halloween Mummy Pizza. It’s a delightful chaos, where gooey cheese drapes over crispy crust like bandages on a sleepy mummy.

    The aroma of baking bread and melting cheese mingles with a hint of smoky pepperoni and fresh herbs, filling the house with an enticing preview of spooky fun. Kids can help sculpt the dough, turning pizza night into a festive craft session. It’s perfect for adding a splash of humor and horror to the Halloween table without the fuss.

    Halloween Mummy Pizza

    This dish features a pizza topped with melted cheese and pepperoni, arranged to resemble a mummy with bandage-like strips. The key steps involve shaping the dough, layering ingredients, and baking until crispy and bubbly, resulting in a playful and visually striking appetizer or main course.
    Prep Time 20 minutes
    Cook Time 15 minutes
    Total Time 35 minutes
    Servings: 4
    Course: Main Course
    Cuisine: American
    Calories: 250

    Ingredients
      

    • 1 package pizza dough store-bought or homemade
    • 1 cup shredded mozzarella cheese or your preferred cheese blend
    • 20 slices pepperoni slices for the mummy’s bandages and face
    • 1 tablespoon olive oil to brush the crust
    • to taste salt and pepper for seasoning
    • 1 teaspoon dried herbs Italian seasoning optional, for extra flavor

    Equipment

    • Rolling pin
    • Baking sheet
    • Parchment paper
    • Oven
    • Knife

    Method
     

    1. Preheat your oven to 400°F (200°C). Line a baking sheet with parchment paper and set aside.
    2. Unroll the pizza dough onto a floured surface and use a rolling pin to gently flatten it into a large circle, about 12 inches in diameter.
      1 cup shredded mozzarella cheese
    3. Transfer the stretched dough onto the prepared baking sheet. Brush the outer edge with olive oil to help it turn golden and crispy during baking.
      1 cup shredded mozzarella cheese
    4. Spread the shredded mozzarella evenly over the dough, leaving a border around the edges. Sprinkle with Italian seasoning, salt, and pepper for added flavor.
      1 cup shredded mozzarella cheese
    5. Arrange pepperoni slices on top of the cheese to create the face of the mummy, positioning a few smaller slices for eyes.
      1 cup shredded mozzarella cheese
    6. Cut thin strips of remaining pepperoni or use extra dough to mimic bandages, covering the cheese and creating a wrapped appearance. Place these strips in a crisscross or straight pattern over the mummy.
      1 cup shredded mozzarella cheese
    7. Bake the pizza in the preheated oven for about 15 minutes, or until the crust is golden brown and the cheese is bubbly and melted.
    8. Remove the pizza from the oven and let it cool slightly before slicing. Serve warm, showcasing the playful mummy design and gooey cheese.

    Notes

    Feel free to add extra details like little nose or mouth features with additional pepperoni slices or veggies for more character.

    This Halloween treat is more than just a meal; it’s a seasonal craft, a sweet chaos of flavors, and a visual giggle for everyone. The crispy edges and gooey center of the mummy pizza remind us that sometimes, messy fun makes the most memorable moments.

    As the nights get cooler and spooky tales fill the air, a slice of this playful pizza can bring a little extra joy to your festivities. It’s a simple way to add humor and creativity, turning ordinary dinner into a celebration of spooky season’s charm.

  • Spice Up Your Week with an Unusual Twist on Taco Soup

    Spice Up Your Week with an Unusual Twist on Taco Soup

    Most Taco Soup recipes stick to the basics, but I like to challenge the usual and add a surprise ingredient that transforms the dish. This time, I incorporated roasted poblano peppers to bring a smoky depth that balances out the spices. The kitchen gets filled with a luscious aroma that hints at something extraordinary even before it hits the bowl.

    There’s something comforting about a warm bowl of Taco Soup, especially when it’s packed with layers of flavor that tell a story. This version invites a touch of chaos with my secret ingredient, making each spoonful a new adventure. Plus, it’s a perfect excuse to turn on the slow cooker and forget about it till dinner scores a knockout.

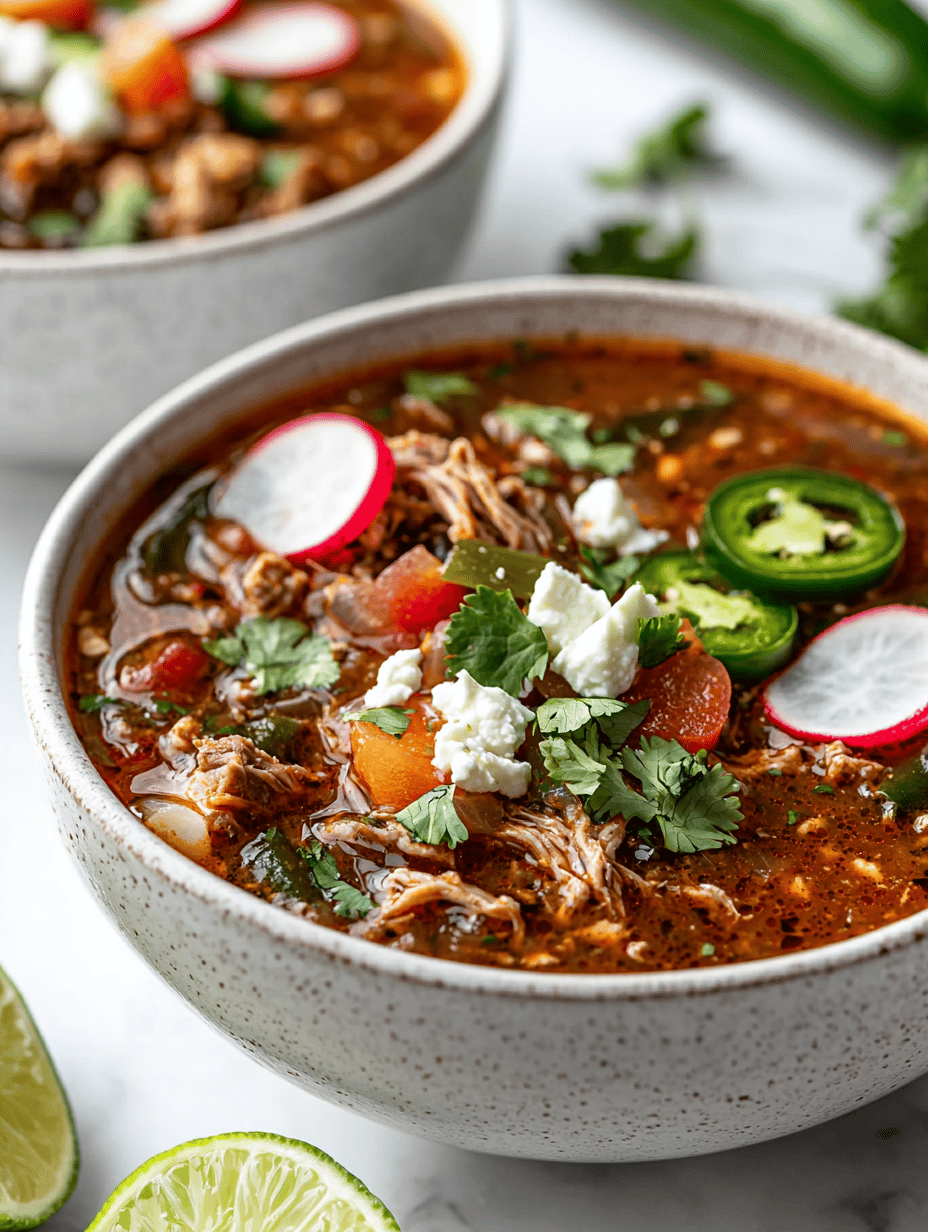
    Smoky Poblano Taco Soup

    This taco soup combines seasoned ground meat, beans, tomatoes, and roasted poblano peppers to create a hearty, flavorful broth with a smoky depth. The dish is cooked slowly to develop rich flavors and has a thick, comforting texture, with tender ingredients floating in a vibrant, spicy tomato-based soup.
    Prep Time 15 minutes
    Cook Time 45 minutes
    Total Time 1 hour
    Servings: 4
    Course: Main Course
    Cuisine: American
    Calories: 350

    Ingredients
      

    • 1 lb ground beef or turkey
    • 2 cans diced tomatoes 14.5 oz each
    • 1 can black beans 15 oz, drained and rinsed
    • 1 cup corn kernels fresh or frozen
    • 2 cups chicken or vegetable broth
    • 2 roasted poblano peppers peeled and chopped
    • 1 tablespoon chili powder
    • 1 teaspoon cumin
    • 1/2 teaspoon paprika
    • to taste salt and pepper

    Equipment

    • Large Skillet
    • Slow Cooker

    Method
     

    1. Dice the roasted poblano peppers, aiming for small, even pieces to ensure they blend well into the soup.
    2. In a large skillet over medium heat, cook the ground beef until browned and cooked through, breaking it apart with a spoon as it cooks. Once browned, drain any excess fat.
    3. Add the chili powder, cumin, paprika, salt, and pepper to the cooked beef. Stir well to coat the meat with the spices, and cook for another minute until fragrant.
    4. Transfer the seasoned beef to the slow cooker. Pour in the diced tomatoes, black beans, corn, and chopped poblano peppers.
    5. Pour the broth over the ingredients in the slow cooker. Stir everything together gently to combine well.
    6. Cover the slow cooker and cook on low for 4 to 6 hours, until the flavors meld and the soup is hot throughout.
    7. Once ready, stir the soup gently to distribute the ingredients evenly, and taste for seasoning adjustments if needed.
    8. Ladle the hot, hearty soup into bowls, revealing a vibrant mixture of ingredients with a smoky aroma. Enjoy immediately.

    Notes

    Optional toppings include shredded cheese, sour cream, chopped cilantro, or lime wedges for added flavor.

    Every time I make this taco soup, I find new ways to tweak the ingredients and keep it exciting. It’s a dish that welcomes improvisation, yet remains hearty and satisfying. Sharing it with friends often turns into an impromptu potluck, where everyone raves about the smoky kick and rich texture.

    As the weather cools, this soup becomes more than just a meal—it’s a ritual for cozy evenings and easy weekend lunches. It’s a reminder that sometimes, a little experimentation can turn an everyday recipe into something memorable. That smoky, spicy aroma is now my signature comfort anytime I need a pick-me-up.

  • Eggplant Parmesan Revival: A Nostalgic Twist with Unexpected Flavors

    Eggplant Parmesan Revival: A Nostalgic Twist with Unexpected Flavors

    Late summer afternoons always remind me of my grandmother’s bustling kitchen, where the smell of frying eggplant mixed with fresh basil filled the air. I recently decided to revive that childhood comfort by reimagining eggplant Parmesan with a daring twist—adding a hint of harissa for a smoky, spicy depth.

    This recipe is not your typical baked-a-layer-of-cheese dish. I experimented with different cheeses and a bold tomato sauce infused with garlic and a splash of red wine, turning simple eggplant into a vibrant centerpiece. It’s a dish that brings back memories but also invites new, exciting flavors to the table.

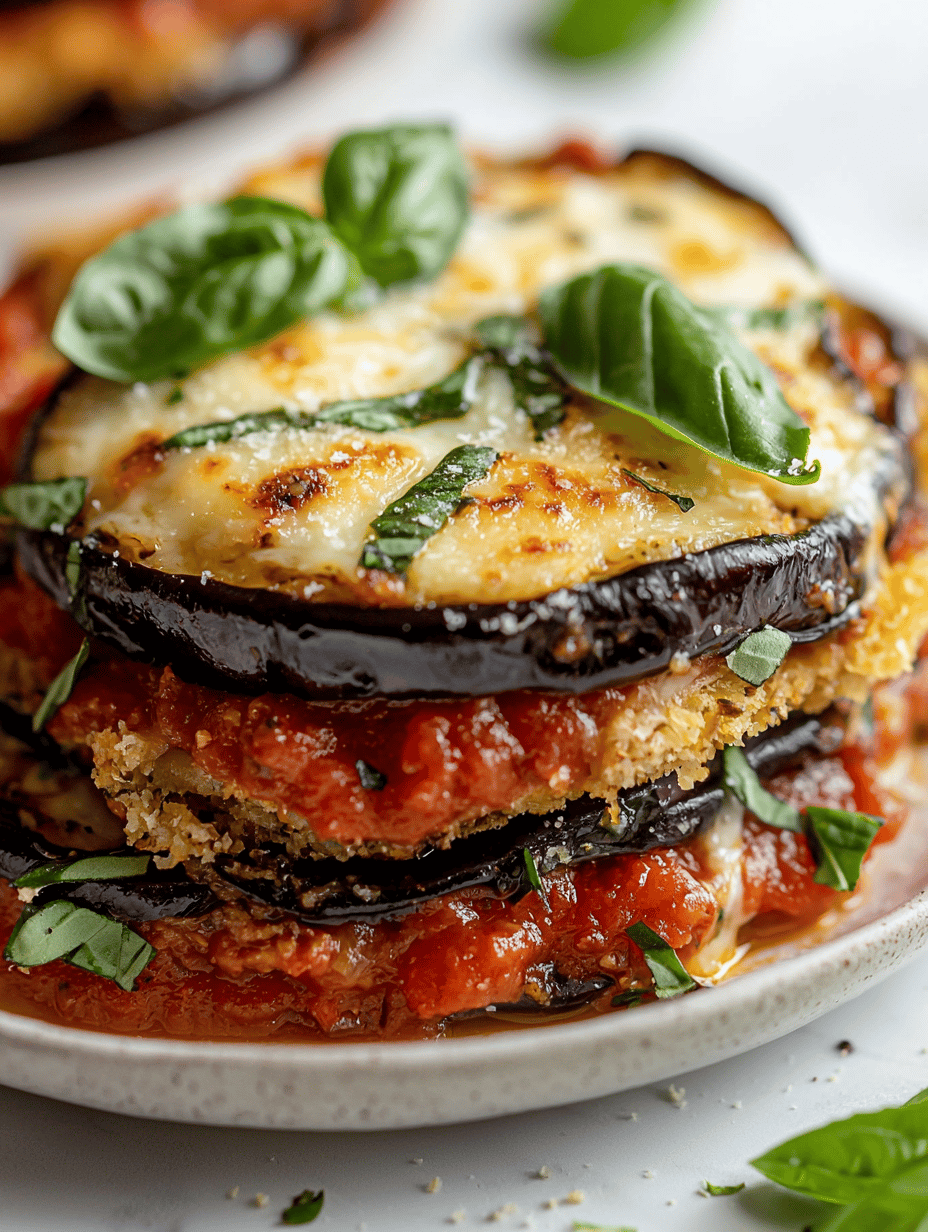
    Eggplant Parmesan with Harissa and Tomato Sauce

    This dish features sliced eggplant that is breaded and fried until golden, layered with a spicy harissa-infused tomato sauce, and topped with melted cheese. The final dish has a crispy exterior with tender interior slices, beautifully coated with vibrant sauce and bubbling cheese on top.
    Prep Time 20 minutes
    Cook Time 30 minutes
    Total Time 50 minutes
    Servings: 4
    Course: Main Course
    Cuisine: Mediterranean
    Calories: 350

    Ingredients
      

    • 2 large eggplants sliced into 1/4-inch rounds
    • 1 cup all-purpose flour for dredging
    • 3 large eggs beaten
    • 1.5 cups breadcrumb preferably seasoned
    • 2 tbsp harissa paste adjust for spice level
    • 2 cups tomato sauce preferably homemade or high-quality store-bought
    • 2 cloves garlic minced
    • 1 splash red wine optional
    • 1 cup mozzarella cheese shredded
    • 0.5 cup Parmesan cheese grated
    • 2 tbsp olive oil for frying

    Equipment

    • Chef’s knife
    • Cutting board
    • Shallow bowls
    • Frying pan
    • Baking dish
    • Oven

    Method
     

    1. Slice the eggplants into 1/4-inch rounds and set them aside.
    2. Prepare three shallow bowls: one with all-purpose flour, one with beaten eggs, and one with seasoned breadcrumb.
    3. Dredge each eggplant slice first in flour, then dip into the beaten eggs, and finally coat evenly with the seasoned breadcrumb. Set aside on a tray.
    4. Heat olive oil in a frying pan over medium heat until shimmering. Carefully place breaded eggplant slices in the pan and fry until golden brown on both sides, about 3-4 minutes per side. Transfer to paper towels to drain excess oil.
    5. In a small saucepan, heat a little olive oil and sauté the minced garlic until fragrant, about 30 seconds. Add the tomato sauce, harissa paste, and red wine, simmering gently for 10 minutes to develop the flavors.
    6. Preheat your oven to 375°F (190°C). Spread a thin layer of the spicy tomato sauce evenly over the bottom of a baking dish.
    7. Arrange a layer of fried eggplant slices over the sauce, then spoon more sauce over the top, ensuring each piece is coated well.
    8. Sprinkle the shredded mozzarella and grated Parmesan cheese evenly over the layered eggplant and sauce.
    9. Place the assembled dish in the oven and bake for about 20 minutes, until the cheese is bubbly and golden.
    10. Remove from the oven and let it sit for 5 minutes to set. Garnish with fresh basil if desired, then serve hot.

    Notes

    For extra flavor, add a sprinkle of red pepper flakes to the sauce or a drizzle of good quality olive oil just before serving.

    Choosing to make eggplant Parmesan this season feels like a small act of rebellion against the hurried pace of modern cooking. It’s a reminder that comforting foods can be exciting again, with just a few tweaks. This dish captures a perfect balance of nostalgia and innovation—ideal for a weekend dinner or a leisurely family feast.

    As the flavors meld and the cheese turns golden, you’ll notice the warmth spreading through your home. Sharing it feels like passing along a secret recipe, even if it’s just a family tradition reinterpreted. Sometimes, the simplest ingredients create the most memorable moments around the table.

  • Discover the Magic of Vegetarian Stuffed Peppers with a Twist

    Discover the Magic of Vegetarian Stuffed Peppers with a Twist

    Cooking this stuffed peppers recipe is like opening a surprise package of textures and flavors. I love how the bells of red, yellow, or orange hold a world of flavor inside them, waiting to be unleashed with a simple filling. This dish connects me to my childhood days when family dinners felt like celebrations, all while sneaking in some veggie goodness.

    This isn’t your average stuffed pepper—each bite offers a harmony of seasoned rice, melted cheese, and tiny bursts of herbs. It’s perfect for those days when you want a comforting yet vibrant meal on the table fast. Plus, the aroma that fills the kitchen makes everyone appear in eager anticipation.

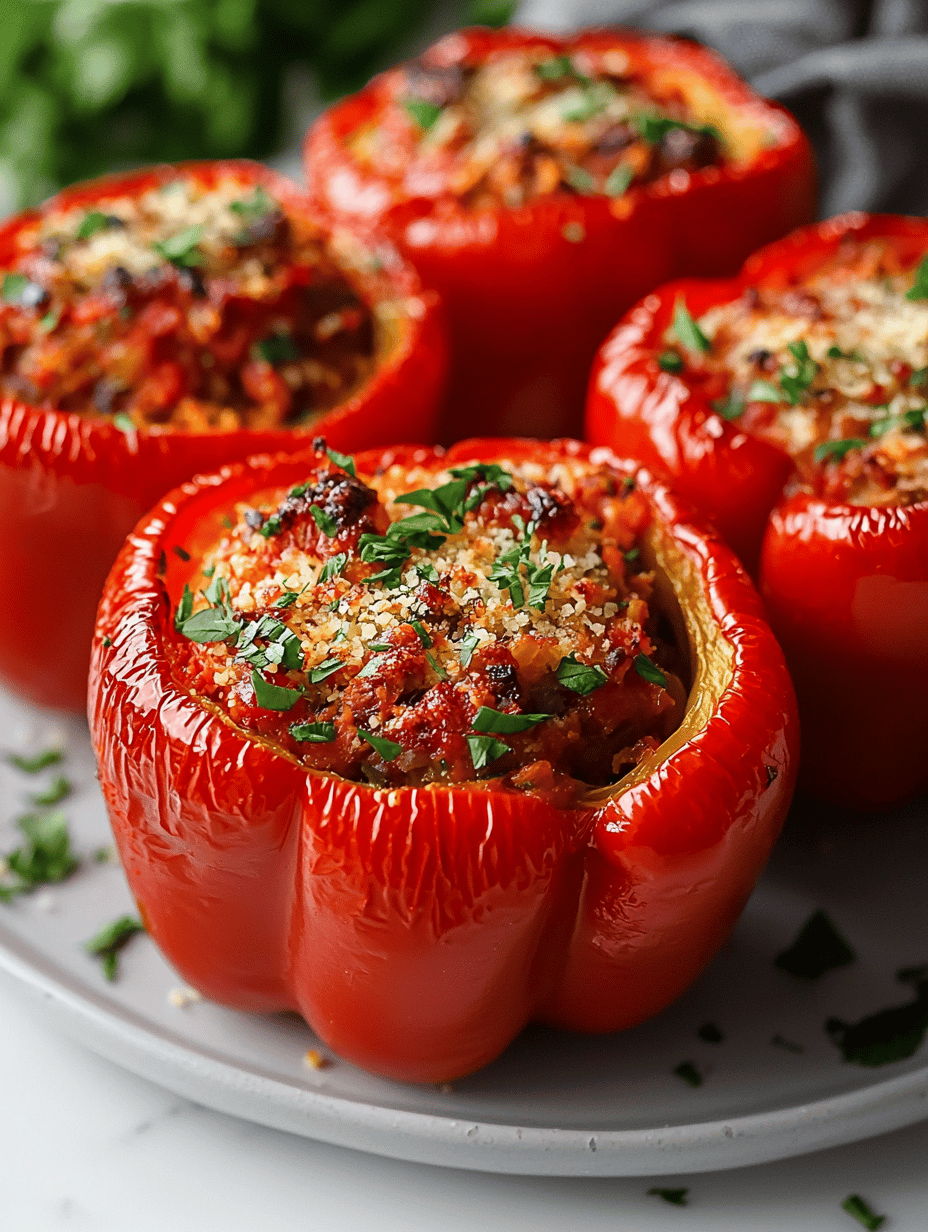
    Stuffed Bell Peppers

    This dish features colorful bell peppers filled with a seasoned mixture of cooked rice, herbs, and melted cheese. The peppers are baked until tender, with the filling bubbling and the cheese forming a golden top, creating a vibrant and hearty presentation.
    Prep Time 20 minutes
    Cook Time 30 minutes
    Total Time 50 minutes
    Servings: 4
    Course: Main Course
    Cuisine: American
    Calories: 250

    Ingredients
      

    • 4 large bell peppers mixed colors preferred
    • 1 cup cooked rice preferably long-grain
    • 1/2 cup shredded cheese cheddar or mozzarella
    • 2 cloves garlic minced
    • 2 tbsp olive oil
    • 1 tsp dried oregano
    • to taste salt and pepper

    Equipment

    • Baking dish
    • Knife

    Method
     

    1. Preheat the oven to 375°F (190°C). Slice the tops off the bell peppers and remove the seeds and membranes, creating a hollow cavity in each pepper.
    2. Cook the minced garlic in olive oil over medium heat until fragrant, about 30 seconds, filling your kitchen with a savory aroma.
    3. Add the cooked rice to the skillet, stirring to coat it in the garlic and oil, then season with oregano, salt, and pepper for flavor.
    4. Stir one-half cup of shredded cheese into the rice mixture for a creamy, cheesy binding that melts during baking.
    5. Stuff each hollowed-out pepper with the prepared rice mixture, pressing gently to fill fully and create a mound on top.
    6. Place the stuffed peppers upright in a baking dish and top with the remaining shredded cheese to build a cheesy crust.
    7. Bake the peppers uncovered in the preheated oven for 25-30 minutes, until the peppers are tender and the cheese is bubbling with a golden-brown hue.
    8. Remove from the oven and allow to cool slightly before serving to let the fillings set and flavors meld.
    These stuffed peppers aren’t just a meal; they’re a small celebration of color and flavor on your plate. Perfect for busy weeknights or when you crave something wholesome but fresh. The best part? This recipe is endlessly adaptable to whatever you have in the pantry.

    As the peppers soften and the cheese melts into a golden crust, you’ll realize how a simple dish can carry such warmth and satisfaction. It’s a reminder that good, hearty food comes from combining fresh ingredients with a touch of creativity. Enjoy these stuffed peppers as a reminder to keep experimenting in the kitchen, no matter the season.

  • Spooky Fun: Halloween Eyeball Pasta with Ghoulish Meatball “Eyeballs”

    Spooky Fun: Halloween Eyeball Pasta with Ghoulish Meatball “Eyeballs”

    Every October, kitchens turn into haunted labs as I craft dishes that bring a touch of spooky cheer to the dinner table. This Halloween Eyeball Pasta is more than just fun — it’s a sensory explosion of savory, cheesy goodness with a playful twist.
    Imagine biting into tender pasta coated in a ghostly white sauce, only to discover eerie meatball “eyeballs” gazing back at you. It’s chaos and joy rolled into one, perfect for a costume party or a family dinner that screams festive joy.
    This dish is my experimental take on classic comfort food, transformed into a playful spectacle that sparks both nostalgia and giggles at the table. With each bite, you’ll get a rush of rich flavors and the thrill of spooky presentation.

    Crafting this Halloween Eyeball Pasta turns a simple family dinner into a theatrical event. It’s a delightful way to celebrate the season with a splash of humor and a lot of flavor.
    Whether you’re serving it for kids or adults who love a good scare, this dish never fails to entertain and satisfy. Plus, it’s easy enough to prepare even when chaos is reigning in the kitchen — perfect for the busy spooky season.

  • Unconventional Chili: A Deep Dive into My Favorite Cozy Comfort

    Unconventional Chili: A Deep Dive into My Favorite Cozy Comfort

    Most chili recipes are pretty straightforward, but I like to approach this dish with a little twist—adding unexpected ingredients that bring new life to familiar flavors. Imagine the warm aroma of smoky chipotle alongside a dash of cinnamon that hints at a subtle sweetness, stirring up memories of family gatherings and rustic kitchens. When I cook this chili, it’s less about perfection and more about creating a warm hug with each spoonful.

    What makes this recipe special isn’t just the flavors, but the process. It’s about turning a simple pot of chili into a sensory experience—sizzling onions, the faint crackle of browning meat, and the simmering scent of cumin that makes the whole house smell like comfort itself. Every step is a ritual that connects me to my culinary roots, even as I experiment with modern twists.

    WHY I LOVE THIS RECIPE?

    • It combines my nostalgic love for homemade chili with a daring flavor mix I can’t find elsewhere.
    • The layers of smoky heat and a touch of sweetness make every bite an adventure.
    • I enjoy how adaptable it is—perfect for leftovers or fresh ingredients.
    • The process is therapeutic—stirring, tasting, adjusting, and watching the flavors meld.
    • This recipe reminds me that sometimes, breaking the rules results in comfort food at its best.

    AVOID MY DISASTER (You’re Welcome)

    • FORGOT to lower the heat before adding spices—ended up bitter. Next time, I taste first!
    • DUMPED too much salt initially—salty disaster. I fixed it with a splash of water and rice.
    • OVER‑TORCHED the onions—burnt smell lingered. Switched to lower heat, rescued the batch with fresh onions.
    • SKIPPED the lid while simmering—partial evaporation dried out the chili. Lesson learned: cover and simmer slow.

    QUICK FIXES THAT SAVE YOUR DAY

    • When too salty—splash in a bit of vinegar and stir. Adds bright notes and balances saltiness.
    • When too thick—impose a quick stir with a splash of broth. It shimmers and becomes soupier.
    • When bland—add a splash of soy sauce or Worcestershire. Boosts umami and deepens flavor.
    • When undercooked—cover and simmer for five more minutes. You’ll hear the juices crackle stronger.
    • When smoky flavor is too mild—toast a pinch of smoked paprika into your spices. Fragrant and bold.

    Cooking chili in unexpected ways keeps my kitchen lively. The rich aroma fills the air, promising comfort with every simmer. This dish resonates with the season—comforting warmth as days grow shorter and evenings turn cooler.

    Even after a busy day, a pot of this chili can make everything feel slower, softer. It’s more than a meal; it’s a small ritual of gathering, sharing, and savoring simple pleasures.

    Smoky Chipotle Chili with Cinnamon

    This chili combines ground meat, beans, and vegetables simmered with smoky chipotle peppers and a touch of cinnamon, resulting in a hearty, thick stew with a complex flavor profile. The dish features a rich, spicy aroma with tender ingredients that develop a deep, savory taste and a robust, slightly chunky texture.
    Prep Time 15 minutes
    Cook Time 45 minutes
    Total Time 1 hour
    Servings: 4
    Course: Main Course
    Cuisine: American
    Calories: 350

    Ingredients
      

    • 1 lb ground beef or turkey or any ground meat
    • 1 large onion diced
    • 3 cloves garlic minced
    • 1 can (14 oz) diced tomatoes with juice
    • 1 can (15 oz) kidney beans drained and rinsed
    • 1 tablespoon smoked paprika adds smoky depth
    • 1 teaspoon cinnamon adds subtle sweetness
    • 1 tablespoon chipotle peppers in adobo sauce chopped finely
    • 2 cups chicken or beef broth
    • 1 tablespoon cumin ground
    • Salt and pepper to taste

    Equipment

    • Large pot or Dutch oven
    • Wooden Spoon or Spatula

    Method
     

    1. Heat the large pot over medium heat, then add the ground meat, breaking it apart with a wooden spoon. Cook until browned and starting to crisp, about 5-7 minutes, releasing a savory aroma.
    2. Add the diced onion to the pot and stir well, cooking until translucent and soft, around 3-4 minutes. You should notice a gentle sizzle and the onion turning clear.
    3. Stir in the minced garlic, cooking for another 30 seconds until fragrant, filling the kitchen with a warm, pungent aroma.
    4. Mix in the smoked paprika, cumin, cinnamon, and chopped chipotle peppers, stirring to coat the meat and vegetables evenly. Let the spices toast slightly, releasing their fragrant oils.
    5. Pour in the diced tomatoes with their juice and add the broth. Stir everything together, scraping up any browned bits from the bottom of the pot for extra flavor.
    6. Bring the chili to a gentle boil, then reduce heat to low, cover the pot partially, and let it simmer gently for 30-40 minutes, allowing the flavors to meld and develop a rich, smoky depth.
    7. Uncover the pot and stir in the rinsed kidney beans, then cook uncovered for an additional 5-10 minutes to thicken slightly and warm the beans through.
    8. Taste the chili and adjust the seasoning with salt and pepper as needed, enhancing the smoky and spicy nuances.
    9. Once the chili is thickened and fragrant, turn off the heat and let it sit for a few minutes; the flavors will settle and deepen.
    10. Serve the chili hot in bowls, optionally garnished with fresh herbs, sour cream, or shredded cheese for extra richness.

    Notes

    For a milder flavor, reduce the amount of chipotle peppers. The chili flavors improve if made a day ahead and reheated. Feel free to add extra vegetables like bell peppers or corn for variation.

    This chili isn’t just about filling bellies; it’s about creating memories with every spoonful. The unexpected flavors and the stories behind each tweak make it more meaningful. When you take the time to layer in those unique ingredients, you’re crafting a dish that’s truly your own.

    Now, whenever I make this chili, I think of home and adventure rolled into one. It’s a reminder that the best comfort foods are often the ones made with a little chaos—and a lot of love. And that’s what makes it worth every simmer and stir.

  • Reviving Vintage Comfort: Chicken Noodle Soup’s Unexpected Depth

    Reviving Vintage Comfort: Chicken Noodle Soup’s Unexpected Depth

    Many Chicken Noodle Soup recipes lean on nostalgic simplicity, but I set out to elevate this classic with a surprising twist. I wanted each spoonful to carry not only warmth but also a rich, roasted undertone that hints at caramelized onions and golden chicken skin. This approach transforms a humble dish into a complex, soul-satisfying experience.

    Imagine the aroma — a simmering blend of herbs that tickle your senses and crispy chicken bits adding a delightful crunch. I discovered that letting the broth sit with roasted vegetables before adding noodles intensifies the flavor. It’s like bringing the soul of a Sunday lunch into your weeknight bowl.

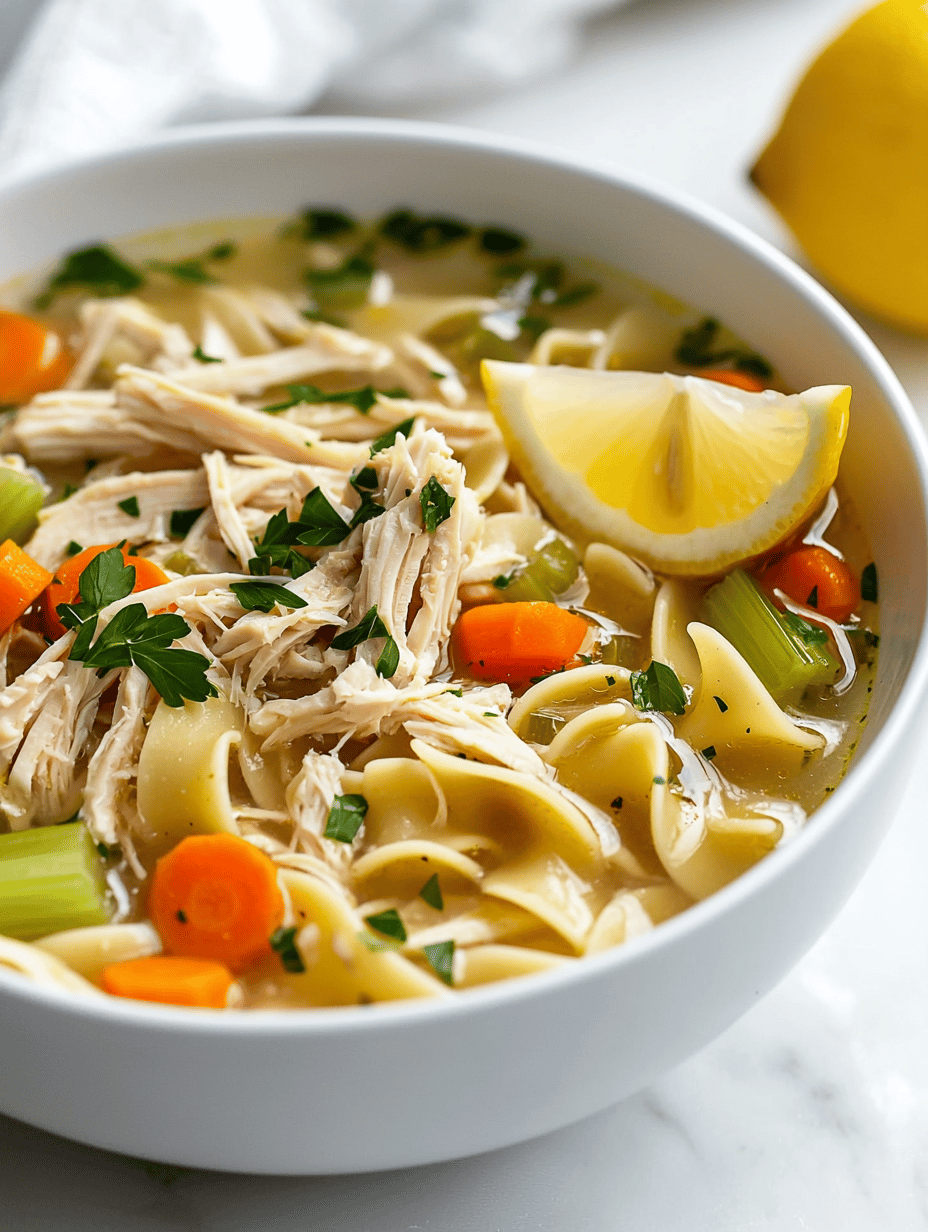
    Roasted Chicken Noodle Soup

    This roasted chicken noodle soup features tender shredded chicken, caramelized onions, and a rich, flavorful broth achieved through roasting vegetables before simmering. The soup has a comforting, hearty texture with a golden-hued broth and soft noodles, topped with crispy chicken bits for added crunch.
    Prep Time 20 minutes
    Cook Time 1 hour
    Total Time 1 hour 20 minutes
    Servings: 4
    Course: Main Course
    Cuisine: American
    Calories: 350

    Ingredients
      

    • 2 lb bone-in chicken thighs skin on
    • 2 large onions sliced
    • 4 cloves garlic minced
    • 3 carrots carrots diced
    • 2 stalks celery diced
    • 8 cups chicken broth
    • 8 oz egg noodles wide or traditional shape
    • 2 tbsp olive oil
    • to taste salt and pepper
    • 1 tbsp fresh thyme or 1 teaspoon dried

    Equipment

    • Baking sheet
    • Large pot
    • Saute pan
    • Wooden spoon

    Method
     

    1. Preheat your oven to 425°F (220°C). Arrange the chicken thighs on a baking sheet, season with salt and pepper, and roast for about 40 minutes until the skin is golden and crispy. This step develops a deep flavor and crispiness that will add depth to your soup.
    2. While the chicken roasts, heat olive oil in a large pot over medium heat. Add sliced onions and cook, stirring occasionally, until they turn caramel brown and smell sweet, about 15-20 minutes. This caramelization adds sweetness and richness to the broth.
    3. Add minced garlic, diced carrots, and celery to the caramelized onions. Cook for another 5 minutes until fragrant and vegetables start to soften. Stir frequently to prevent sticking and promote even cooking.
    4. Once the chicken thighs are done, remove from the oven and let rest for a few minutes. Meanwhile, pour chicken broth into the pot with the vegetables, scraping up any browned bits from the bottom to deepen the flavor. Add thyme and bring the broth to a simmer.
    5. Skim the skin from the roasted chicken thighs if desired, then shred the meat off the bones using two forks. Add the shredded chicken to the simmering broth. Continue cooking on low heat for 10 minutes to meld flavors.
    6. Meanwhile, cook the egg noodles separately in boiling salted water according to package instructions until just al dente. Drain and set aside.
    7. Add the cooked noodles into the soup pot, stirring gently to combine. Let everything simmer together for another 3-5 minutes to absorb the flavors and warm the noodles.
    8. Taste the broth and adjust salt and pepper as needed. Remove from heat and serve the soup hot, garnished with crispy chicken bits if desired for added texture.

    Notes

    For a more intense flavor, let the broth sit with roasted vegetables for an hour before adding noodles. You can also add fresh herbs or a squeeze of lemon for brightness.

    This recipe is perfect for those busy evenings when you crave comfort but also want to feel something exciting in every bite. The slow roasting, the aromatic herbs, and the tender noodles create a harmony that’s both familiar and refreshingly new. It’s a reminder that even old favorites can surprise us with a little creativity.

    Sharing this soup offers a cozy touch in the midst of chilly days, but it’s also a way to slow down and appreciate the art of simple cooking. No matter how many bowls you’ve slurped in the past, this version invites a fresh appreciation—and maybe a new tradition, too.

  • Spooky Good: Halloween Bat Wings with Soy Sauce Glaze

    Spooky Good: Halloween Bat Wings with Soy Sauce Glaze

    Every October, I find myself craving snacks that are both eerie and delicious. This year, I’ve baked up a batch of Halloween Bat Wings, a playful twist on classic chicken wings, inspired by the shapes of bats hanging upside down. The soy sauce glaze gives the wings a deep, savory flavor that balances their visual fun.

    What sets these wings apart is the way they turn your dinner into a little costume party. The dark, glossy coating makes them look like tiny bat silhouettes—perfect for Halloween parties or a spooky movie night. Plus, they’re surprisingly quick to prepare, so chaos in the kitchen doesn’t have to be part of the fun.

    Halloween Bat Wings

    Halloween Bat Wings are baked chicken wings coated in a savory soy sauce glaze, shaped and finished to resemble small bats hanging upside down. The wings develop a glossy, dark coating with crispy edges, creating an eerie yet flavorful appetizer suitable for Halloween celebrations.
    Prep Time 15 minutes
    Cook Time 30 minutes
    Total Time 45 minutes
    Servings: 4
    Course: Main Course
    Cuisine: American
    Calories: 350

    Ingredients
      

    • 2 pounds chicken wings drumettes and wingettes, skin-on
    • 3 tablespoons soy sauce for the glaze
    • 2 tablespoons honey adds sweetness and shine
    • 1 teaspoon garlic powder for flavor
    • 1 teaspoon black pepper optional, for seasoning
    • 1 tablespoon vegetable oil for coating

    Equipment

    • Baking sheet
    • Cooking brush
    • Mixing bowl
    • Aluminum foil

    Method
     

    1. Preheat your oven to 400°F (200°C) and line a baking sheet with aluminum foil. Pat the chicken wings dry with paper towels to ensure they crisp properly during baking.
    2. In a large mixing bowl, toss the chicken wings with vegetable oil until evenly coated. This helps the skin roast up crispy.
    3. Arrange the wings in a single layer on the prepared baking sheet, leaving space between each piece for even cooking.
    4. Bake the wings in the preheated oven for about 25-30 minutes, flipping halfway through, until they are golden brown and crispy.
    5. Meanwhile, prepare the glaze by whisking together soy sauce, honey, garlic powder, and black pepper in a small bowl. The mixture should be smooth and slightly thickened.
    6. Remove the wings from the oven and transfer them to a clean mixing bowl. Pour the soy sauce glaze over the hot wings.
    7. Toss the wings gently to evenly coat them with the glaze, listening for a slight sizzling as the sauce starts to caramelize slightly.
    8. Using a basting brush, carefully brush a small amount of the glazed mixture onto the tips of the wings to emphasize the bat silhouette shape.
    9. Arrange the coated wings on a serving platter, positioning their tips downward or slightly curved to resemble bats hanging upside down.
    10. Optional: Add small edible decorations like sliced olives or small bits of seaweed to enhance the bat shape if desired.
    11. Serve the Halloween Bat Wings immediately, enjoying their crispy texture and savory-sweet flavor while they’re hot and glossy.

    These Halloween Bat Wings are a fun way to bring a touch of darkness to your October table. The crunchy exterior paired with savory soy flavor makes every bite memorable. They’re perfect for assembling quick snacks that wow with their spooky appeal.

    As the season gets busier, these wings become a trusty favorite—simple, flavorful, and delightfully eerie. They remind me that a little creativity in the kitchen can turn ordinary ingredients into something truly festive. So, gather your ingredients, turn down the lights, and let the haunting begin.

  • Layered Comfort: The Unconventional Twist of Lasagna Soup

    Layered Comfort: The Unconventional Twist of Lasagna Soup

    When the weather cools and the craving for cozy tends to rise, I find myself reaching for unexpected comfort foods. This Lasagna Soup Recipe turns the traditional dish on its head, blending the richness of lasagna with the warmth of a hearty soup. The aroma of bubbling cheese and fragrant herbs wafting through my kitchen instantly lifts my mood.

    What sets this soup apart is the delicate balance of flavors—melty cheese, tangy tomato, and savory meat—encased in a liquid that feels nourishing and indulgent. It’s perfect for those busy weeknights when you want a meal that tastes like a casserole but doesn’t demand endless layers and baking time. Each spoonful feels like a warm hug that goes down easy and leaves you satisfied without the post-meal heaviness.

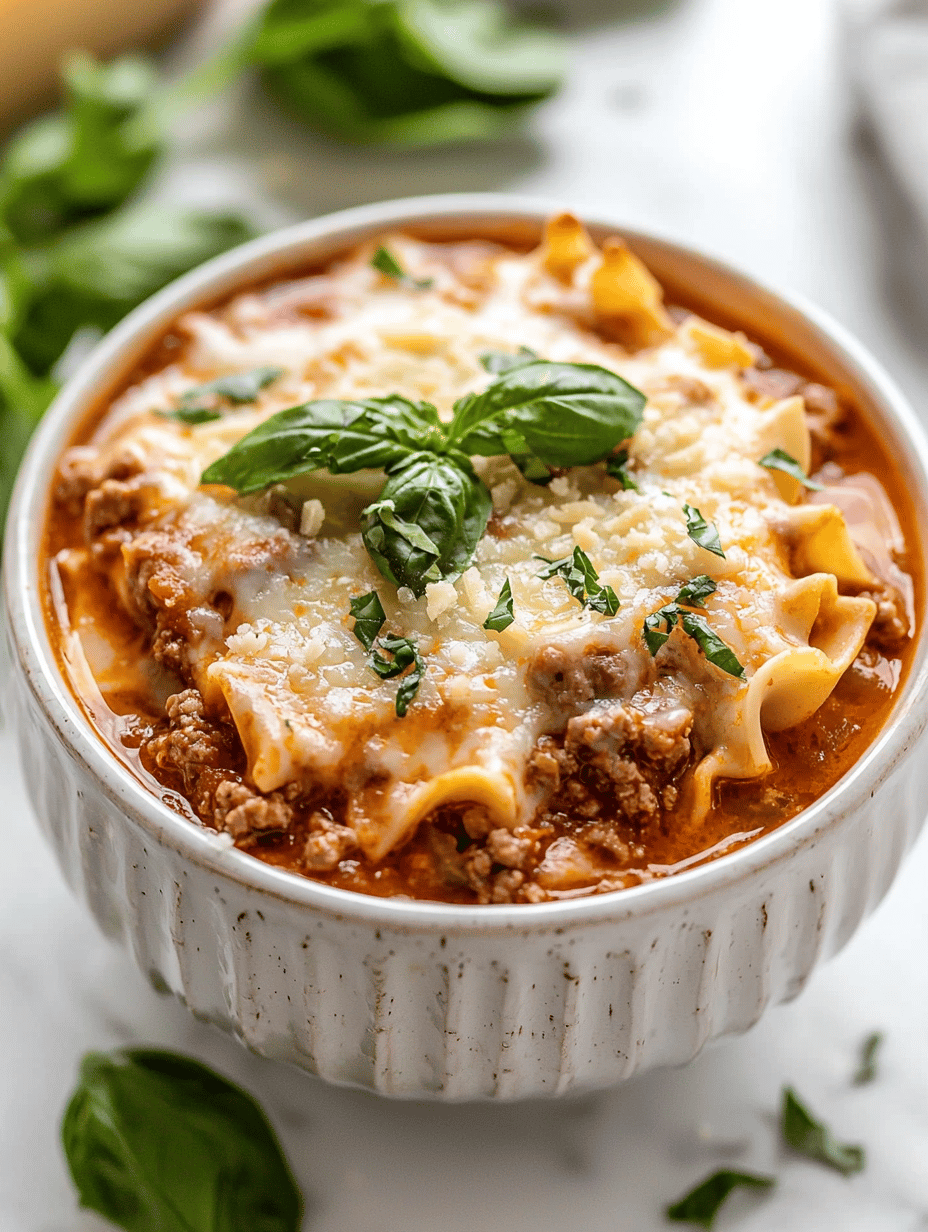
    Lasagna Soup

    This lasagna soup combines the flavors of traditional lasagna into a hearty, flavorful broth with melted cheese, tomato flavors, and seasoned meat. It is cooked using simmering and topping techniques, resulting in a comforting, slightly thickened soup with a cheesy, bubbly crust on top. The final appearance features a vibrant red broth garnished with melted cheese and fresh herbs, offering a rustic yet indulgent presentation.
    Prep Time 15 minutes
    Cook Time 30 minutes
    Total Time 45 minutes
    Servings: 4
    Course: Main Course
    Cuisine: American
    Calories: 350

    Ingredients
      

    • 1 lb ground beef or turkey, optional
    • 1 medium onion chopped
    • 3 cloves garlic minced
    • 28 oz crushed tomatoes canned
    • 4 cups beef or chicken broth
    • 1 cup uncooked pasta shells or other small pasta
    • 1 cup mozzarella cheese shredded
    • 1/2 cup Parmesan cheese grated
    • 2 tsp Italian seasoning
    • to taste Salt and pepper for seasoning

    Equipment

    • Large pot
    • Wooden spoon

    Method
     

    1. Heat a large pot over medium-high heat, then add the ground beef. Cook until browned, breaking it apart with a wooden spoon, about 5 minutes. Remove excess fat if necessary.
      1 medium onion
    2. Add chopped onion and minced garlic to the pot with the beef. Sauté until the onion is translucent and the garlic is fragrant, about 3-4 minutes, stirring frequently.
      1 medium onion
    3. Pour in the crushed tomatoes and beef broth into the pot. Stir to combine, scraping up any browned bits from the bottom of the pan.
      1 medium onion
    4. Stir in the Italian seasoning, salt, and pepper. Bring the mixture to a gentle boil, then reduce the heat to a simmer.
      1 medium onion
    5. Add the uncooked pasta shells to the simmering broth. Cook according to package instructions until al dente, about 8-10 minutes, stirring occasionally.
      1 medium onion
    6. Once the pasta is tender, sprinkle the shredded mozzarella and grated Parmesan cheese over the soup. Cover the pot and let sit for 2-3 minutes until the cheese melts and the soup turns slightly thickened, with bubbling and melted cheese on top.
      1 medium onion
    7. Give the soup a gentle stir to combine the melted cheese evenly, then ladle it into bowls. Garnish with extra herbs if desired, and serve hot for a comforting, cheesy meal.

    This dish is a little culinary rebellion, a way to enjoy everything you love about lasagna but in a more approachable form. It’s a reminder that sometimes, breaking the rules in the kitchen leads to the most comforting results. As the seasons change, this soup proves that good things come from thinking beyond the traditional pot.

    Whenever I make this, I’m reminded of family dinners and lazy Sunday afternoons. It’s a dish that invites you to slow down, savor each bite, and appreciate simple ingredients turned extraordinary. No matter how chaotic life gets, this soup is a small act of culinary joy that always delivers.