Blog

  • Spiced Pumpkin Cookies: A Cozy Autumn Secret

    Spiced Pumpkin Cookies: A Cozy Autumn Secret

    As the air turns crisp and the leaves begin to crunch beneath our feet, I find myself craving the comforting aroma of baked goods that evoke fall’s essence. This pumpkin cookies recipe isn’t just about taste; it’s about capturing the spirit of autumn in every bite. Using only pantry staples, these cookies transform simple ingredients into a nostalgic treat with a surprising depth of flavor.

    When I first discovered this recipe, it felt like unearthing a hidden treasure — the perfect way to celebrate pumpkin season. The scent of cinnamon and nutmeg fills my kitchen, creating a warm, inviting atmosphere. These cookies are not just desserts; they are a small celebration of the fleeting beauty of fall.

    ### WHY I LOVE THIS RECIPE?
    – The aroma of baking spices that makes the house smell like a holiday.
    – The crunch on the edges coupled with a soft, chewy center — a perfect contrast.
    – The simple ingredients that come together quickly, bringing joy even on busy days.
    – The memory of pumpkin patches and cozy sweaters flooding back with each batch.
    – Shareable, snackable, and always a crowd-pleaser amid friends and family.

    Pumpkin Cookies

    These pumpkin cookies combine pantry staples with warm spices, yielding soft centers and slightly crunchy edges. The dough is mixed, shaped, and baked until golden and fragrant, resulting in cookies that are chewy on the inside with a subtle pumpkin flavor and spiced aroma.
    Prep Time 15 minutes
    Cook Time 12 minutes
    Total Time 27 minutes
    Servings: 24
    Course: Main Course
    Cuisine: American
    Calories: 150

    Ingredients
      

    • 1 cup granulated sugar
    • 1/2 cup unsalted butter softened
    • 1 cup canned pumpkin puree
    • 1 large egg
    • 2 cups all-purpose flour
    • 1 teaspoon ground cinnamon
    • 1/2 teaspoon ground nutmeg
    • 1/2 teaspoon baking soda
    • 1/4 teaspoon salt

    Equipment

    • Mixing bowls
    • Baking sheet

    Method
     

    1. In a large mixing bowl, beat together the softened butter and sugar until the mixture is light and fluffy, about 2-3 minutes. The mixture should look smooth and creamy, with a gentle sheen.
    2. Add the egg and pumpkin puree to the butter mixture, mixing well after each addition. Continue until fully incorporated; the batter will become slightly thicker and more homogeneous.
    3. In a separate bowl, whisk together the flour, cinnamon, nutmeg, baking soda, and salt to evenly distribute the spices and leavening agents.
    4. Gradually add the dry ingredients into the wet mixture, folding gently with a spatula or mixing on low speed until just combined. The dough will be soft and slightly sticky but hold together well.
    5. Line a baking sheet with parchment paper and scoop spoonfuls of dough, placing them about 2 inches apart. Use the back of a fork or your fingers to gently flatten each cookie into a disc shape.
    6. Bake the cookies in a preheated oven at 350°F (175°C) for 12-15 minutes, or until the edges are golden and slightly crisp. The centers should remain soft and chewy.
    7. Remove the baking sheet from the oven and let the cookies cool on it for 5 minutes before transferring them to a wire rack. This helps set their shape and makes them easier to handle.
    8. Once cooled, enjoy the cookies either warm or at room temperature, savoring their soft, chewy interior and lightly crispy edges.
    In today’s fast-paced world, it’s nice to have a recipe that reminds us of slower, simpler times. These pumpkin cookies are perfect for crisp mornings or chilly evenings when you want to gather loved ones around. Trust me, the warm spices and subtle sweetness never fail to spark a moment of comfort.

    So, next time the pumpkin craving hits or you want a small edible hug, bake up a batch. Embrace the joy of baking these cookies — they might just become your new seasonal staple. After all, sometimes it’s the little things, like a batch of pumpkin cookies, that make the season memorable.

  • Spooky Splash: The Haunted Poison Apple Martini

    Spooky Splash: The Haunted Poison Apple Martini

    Imagine a cocktail that captures the eerie allure of Halloween with the crispness of a fresh apple and a whisper of danger. This Poison Apple Martini transforms your typical happy hour into a spooky ritual, perfect for celebrating the haunting season. Its vibrant green hue and mysterious flavor profile make it a centerpiece of any ghostly gathering.

    Crafting this drink is like casting a spell — it’s quick, fun, and a little daring. As the citrus scent hits your nose, you’ll feel the thrill of the season seep into every sip. It’s an unconventional twist that invites both playful chaos and elegant mischief at your Halloween party.

    Poison Apple Martini

    The Poison Apple Martini is a vibrant green cocktail that combines crisp apple flavors with a touch of citrus and herbal notes. It features a smooth, icy texture with a striking color, making it visually appealing and perfect for Halloween-themed gatherings. The drink is shaken to chill and dilute slightly, resulting in a refreshingly eerie beverage with a hint of danger.
    Prep Time 5 minutes
    Total Time 5 minutes
    Servings: 2
    Course: Main Course
    Cuisine: mixed drinks
    Calories: 200

    Ingredients
      

    • 2 green apple liqueur for vibrant flavor and color
    • 2 oz vodka
    • 1 oz fresh lime juice adds citrus brightness
    • 0.5 oz simple syrup balances the tartness
    • a few drops Green food coloring for intense color
    • Ice cubes ice to chill the drink

    Equipment

    • Cocktail shaker
    • Strainer
    • Martini glasses

    Method
     

    1. Fill the cocktail shaker halfway with ice cubes to start chilling.
    2. Pour in the green apple liqueur and vodka into the shaker.
    3. Add freshly squeezed lime juice and simple syrup for a balanced tart and sweet flavor.
    4. Add a few drops of green food coloring to intensify the eerie hue.
    5. Secure the lid on the shaker and shake vigorously for about 15 seconds until the mixture is well chilled and slightly frothy.
    6. Remove the lid and strain the vibrant green cocktail into chilled martini glasses to prevent ice shards.
    7. Serve immediately, garnished with a thin apple slice or a ghostly decoration if desired.

    Notes

    For extra spooky effect, rim the glasses with sugared black salt or place a small dry ice chunk for fog effect (handle with care).
    As the night wears on, this Poison Apple Martini will become your signature toast, intriguing guests and sparking conversations. Its vibrant color and daring flavor make it stand out on any festive table.

    Whether you’re hosting a spooky soirée or enjoying a quiet evening with themed spirits, this cocktail adds a dash of witchy fun. A simple yet striking addition to your seasonal repertoire, it’s bound to leave a lasting impression. Cheers to embracing the thrill of Halloween, one mischievous sip at a time.

  • The Secret Ingredient That Elevates Your Peach Crisp

    The Secret Ingredient That Elevates Your Peach Crisp

    Imagine a peach crisp that not only captures the sweet, luscious aroma of ripe peaches but also surprises you with an unexpected hint of garnish that takes it to a whole new level. This dessert is my go-to when I want to impress unexpectedly—no fancy ingredients needed. It’s about revving up simple pantry staples and a handful of fresh peaches into a nostalgic yet novel treat.

    As the seasons change, so do the possibilities for fruit desserts, but there’s something about the classic peach crisp that feels both timeless and playful. Today, I’m sharing a version where a tiny tweak transforms the familiar into something memorable, perfect for gatherings or cozy nights at home.

    Peach Crisp with Garnish

    This peach crisp combines juicy, ripe peaches topped with a crisp, buttery streusel. The dessert is baked until bubbly and golden, creating a warm, tender fruit filling contrasted with a crunchy topping, finished with a decorative garnish for added flavor and visual appeal.
    Prep Time 15 minutes
    Cook Time 35 minutes
    Total Time 50 minutes
    Servings: 4
    Course: Main Course
    Cuisine: American
    Calories: 220

    Ingredients
      

    • 4 cups ripe peaches peeled, pitted, sliced
    • 1/2 cup granulated sugar
    • 1 tablespoon lemon juice to balance sweetness
    • 1 cup all-purpose flour
    • 1/2 cup rolled oats
    • 1/2 cup brown sugar
    • 1/2 cup unsalted butter cold and cubed
    • Pinch salt
    • Optional fresh mint or edible flowers for garnish

    Equipment

    • Mixing bowls
    • Baking dish
    • pastry cutter or fork
    • Oven

    Method
     

    1. Preheat your oven to 350°F (175°C). In a mixing bowl, combine sliced peaches with sugar and lemon juice, tossing gently to coat. Spread the mixture evenly in a baking dish.
    2. In another bowl, make the streusel topping by combining flour, oats, brown sugar, salt, and cold, cubed butter. Use a pastry cutter or fork to cut in the butter until the mixture resembles coarse crumbs.
    3. Sprinkle the streusel evenly over the peaches, covering the surface completely.
    4. Place the baking dish in the preheated oven and bake for about 35 minutes, or until the topping is golden brown and the filling is bubbling around the edges.
    5. Remove from the oven and let it cool slightly. For a decorative touch, sprinkle with finely chopped fresh mint or edible flowers if desired.
    6. Scoop warm portions into bowls, ensuring each serving gets plenty of the luscious fruit and crunchy topping. Enjoy this classic dessert with a twist for a delightful treat.

    Notes

    For extra flavor, add a pinch of cinnamon or vanilla extract to the peach filling.
    This peach crisp isn’t just a dish; it’s a memory waiting to happen. The first bite releases a burst of juicy peaches wrapped in crunchy, buttery topping—pure comfort with a twist.

    Keep it simple and let the natural sweetness shine, or get creative with a sprinkle of toasted oats or a dash of cinnamon. Either way, it’s a reminder that even old favorites can have a little surprise hidden under that crispy topping.

  • Cool, Bright & Chewy: The Blue Raspberry Slushie Secret

    Cool, Bright & Chewy: The Blue Raspberry Slushie Secret

    There’s a certain nostalgia tied to the sight of a blue raspberry slushie melting in the summer sun. But today, I want to dive into a lesser-known twist—a slushie that combines the tart vibrancy of blue raspberry with a chewy, candy-like texture. It’s like biting into a frozen, icy version of your favorite childhood treat, with a playful twist.

    What makes this recipe stand out? It’s the way the flavors pop in your mouth and the way the slushie’s texture sends delightful shivers down your spine. Perfect for those scorching afternoons or just to add a splash of color to your day, this icy concoction feels like a mini adventure in every sip. Plus, it’s surprisingly simple to make at home with just a few pantry staples.

    Blue Raspberry Candy Slushie

    This slushie combines tart blue raspberry flavor with a chewy, candy-like texture achieved by blending crushed ice and sweet syrup. It has a vibrant blue color with a semi-frozen, icy yet chewy appearance, reminiscent of childhood treats. The final consistency is thick and slushy, perfect for hot days or a fun, colorful dessert.
    Prep Time 10 minutes
    Total Time 10 minutes
    Servings: 2
    Course: Main Course
    Cuisine: modern dessert
    Calories: 120

    Ingredients
      

    • 2 cups crushed ice preferably finely crushed for smoother texture
    • 1/4 cup blue raspberry syrup adjust for sweetness preference
    • 1 tbsp cornstarch to create chewy, candy-like texture
    • 2 tbsp water for dissolving cornstarch

    Equipment

    • Blender
    • Measuring cups and spoons

    Method
     

    1. Measure the crushed ice and place it into your blender.
    2. Mix the blue raspberry syrup with water and stir until fully combined, then pour it over the crushed ice.
    3. In a small bowl, whisk the cornstarch with a little water until smooth and free of lumps.
    4. Bring the cornstarch mixture to a gentle simmer in the microwave or stove until it thickens slightly, about 30 seconds to 1 minute.
    5. Add the thickened cornstarch to the blender and pulse a few times to evenly distribute, giving the slushie a chewy, candy-like consistency.
    6. Blend on high for about 20-30 seconds until the mixture is uniform and starts to look slushy with a slightly thicker, chewy texture.
    7. Pour the slushie into glasses immediately, noting the vibrant blue color and icy, semi-opaque appearance.
    8. Serve immediately with a straw, enjoying the cold, chewy, and icy texture that makes each sip playful and nostalgic.

    This blue raspberry slushie isn’t just a drink; it’s a burst of joy in a glass that takes me back to carefree summers. It’s perfect for experimenting with different textures and keeping the kids happy or just treating yourself to something fun and refreshing. The best part? It’s so easy to customize with your favorite candies or flavors, making each batch uniquely yours.

    Now is the right time to embrace this icy, colorful delight. With the warm weather creeping in, this slushie will be your go-to for quick relief and a splash of nostalgia. Cheers to simple pleasures and tasty memories that never go out of style.

  • Unconventional Chili: A Deep Dive into My Favorite Cozy Comfort

    Unconventional Chili: A Deep Dive into My Favorite Cozy Comfort

    Most chili recipes are pretty straightforward, but I like to approach this dish with a little twist—adding unexpected ingredients that bring new life to familiar flavors. Imagine the warm aroma of smoky chipotle alongside a dash of cinnamon that hints at a subtle sweetness, stirring up memories of family gatherings and rustic kitchens. When I cook this chili, it’s less about perfection and more about creating a warm hug with each spoonful.

    What makes this recipe special isn’t just the flavors, but the process. It’s about turning a simple pot of chili into a sensory experience—sizzling onions, the faint crackle of browning meat, and the simmering scent of cumin that makes the whole house smell like comfort itself. Every step is a ritual that connects me to my culinary roots, even as I experiment with modern twists.

    WHY I LOVE THIS RECIPE?

    • It combines my nostalgic love for homemade chili with a daring flavor mix I can’t find elsewhere.
    • The layers of smoky heat and a touch of sweetness make every bite an adventure.
    • I enjoy how adaptable it is—perfect for leftovers or fresh ingredients.
    • The process is therapeutic—stirring, tasting, adjusting, and watching the flavors meld.
    • This recipe reminds me that sometimes, breaking the rules results in comfort food at its best.

    AVOID MY DISASTER (You’re Welcome)

    • FORGOT to lower the heat before adding spices—ended up bitter. Next time, I taste first!
    • DUMPED too much salt initially—salty disaster. I fixed it with a splash of water and rice.
    • OVER‑TORCHED the onions—burnt smell lingered. Switched to lower heat, rescued the batch with fresh onions.
    • SKIPPED the lid while simmering—partial evaporation dried out the chili. Lesson learned: cover and simmer slow.

    QUICK FIXES THAT SAVE YOUR DAY

    • When too salty—splash in a bit of vinegar and stir. Adds bright notes and balances saltiness.
    • When too thick—impose a quick stir with a splash of broth. It shimmers and becomes soupier.
    • When bland—add a splash of soy sauce or Worcestershire. Boosts umami and deepens flavor.
    • When undercooked—cover and simmer for five more minutes. You’ll hear the juices crackle stronger.
    • When smoky flavor is too mild—toast a pinch of smoked paprika into your spices. Fragrant and bold.

    Cooking chili in unexpected ways keeps my kitchen lively. The rich aroma fills the air, promising comfort with every simmer. This dish resonates with the season—comforting warmth as days grow shorter and evenings turn cooler.

    Even after a busy day, a pot of this chili can make everything feel slower, softer. It’s more than a meal; it’s a small ritual of gathering, sharing, and savoring simple pleasures.

    Smoky Chipotle Chili with Cinnamon

    This chili combines ground meat, beans, and vegetables simmered with smoky chipotle peppers and a touch of cinnamon, resulting in a hearty, thick stew with a complex flavor profile. The dish features a rich, spicy aroma with tender ingredients that develop a deep, savory taste and a robust, slightly chunky texture.
    Prep Time 15 minutes
    Cook Time 45 minutes
    Total Time 1 hour
    Servings: 4
    Course: Main Course
    Cuisine: American
    Calories: 350

    Ingredients
      

    • 1 lb ground beef or turkey or any ground meat
    • 1 large onion diced
    • 3 cloves garlic minced
    • 1 can (14 oz) diced tomatoes with juice
    • 1 can (15 oz) kidney beans drained and rinsed
    • 1 tablespoon smoked paprika adds smoky depth
    • 1 teaspoon cinnamon adds subtle sweetness
    • 1 tablespoon chipotle peppers in adobo sauce chopped finely
    • 2 cups chicken or beef broth
    • 1 tablespoon cumin ground
    • Salt and pepper to taste

    Equipment

    • Large pot or Dutch oven
    • Wooden Spoon or Spatula

    Method
     

    1. Heat the large pot over medium heat, then add the ground meat, breaking it apart with a wooden spoon. Cook until browned and starting to crisp, about 5-7 minutes, releasing a savory aroma.
    2. Add the diced onion to the pot and stir well, cooking until translucent and soft, around 3-4 minutes. You should notice a gentle sizzle and the onion turning clear.
    3. Stir in the minced garlic, cooking for another 30 seconds until fragrant, filling the kitchen with a warm, pungent aroma.
    4. Mix in the smoked paprika, cumin, cinnamon, and chopped chipotle peppers, stirring to coat the meat and vegetables evenly. Let the spices toast slightly, releasing their fragrant oils.
    5. Pour in the diced tomatoes with their juice and add the broth. Stir everything together, scraping up any browned bits from the bottom of the pot for extra flavor.
    6. Bring the chili to a gentle boil, then reduce heat to low, cover the pot partially, and let it simmer gently for 30-40 minutes, allowing the flavors to meld and develop a rich, smoky depth.
    7. Uncover the pot and stir in the rinsed kidney beans, then cook uncovered for an additional 5-10 minutes to thicken slightly and warm the beans through.
    8. Taste the chili and adjust the seasoning with salt and pepper as needed, enhancing the smoky and spicy nuances.
    9. Once the chili is thickened and fragrant, turn off the heat and let it sit for a few minutes; the flavors will settle and deepen.
    10. Serve the chili hot in bowls, optionally garnished with fresh herbs, sour cream, or shredded cheese for extra richness.

    Notes

    For a milder flavor, reduce the amount of chipotle peppers. The chili flavors improve if made a day ahead and reheated. Feel free to add extra vegetables like bell peppers or corn for variation.

    This chili isn’t just about filling bellies; it’s about creating memories with every spoonful. The unexpected flavors and the stories behind each tweak make it more meaningful. When you take the time to layer in those unique ingredients, you’re crafting a dish that’s truly your own.

    Now, whenever I make this chili, I think of home and adventure rolled into one. It’s a reminder that the best comfort foods are often the ones made with a little chaos—and a lot of love. And that’s what makes it worth every simmer and stir.

  • Reviving Vintage Comfort: Chicken Noodle Soup’s Unexpected Depth

    Reviving Vintage Comfort: Chicken Noodle Soup’s Unexpected Depth

    Many Chicken Noodle Soup recipes lean on nostalgic simplicity, but I set out to elevate this classic with a surprising twist. I wanted each spoonful to carry not only warmth but also a rich, roasted undertone that hints at caramelized onions and golden chicken skin. This approach transforms a humble dish into a complex, soul-satisfying experience.

    Imagine the aroma — a simmering blend of herbs that tickle your senses and crispy chicken bits adding a delightful crunch. I discovered that letting the broth sit with roasted vegetables before adding noodles intensifies the flavor. It’s like bringing the soul of a Sunday lunch into your weeknight bowl.

    Roasted Chicken Noodle Soup

    This roasted chicken noodle soup features tender shredded chicken, caramelized onions, and a rich, flavorful broth achieved through roasting vegetables before simmering. The soup has a comforting, hearty texture with a golden-hued broth and soft noodles, topped with crispy chicken bits for added crunch.
    Prep Time 20 minutes
    Cook Time 1 hour
    Total Time 1 hour 20 minutes
    Servings: 4
    Course: Main Course
    Cuisine: American
    Calories: 350

    Ingredients
      

    • 2 lb bone-in chicken thighs skin on
    • 2 large onions sliced
    • 4 cloves garlic minced
    • 3 carrots carrots diced
    • 2 stalks celery diced
    • 8 cups chicken broth
    • 8 oz egg noodles wide or traditional shape
    • 2 tbsp olive oil
    • to taste salt and pepper
    • 1 tbsp fresh thyme or 1 teaspoon dried

    Equipment

    • Baking sheet
    • Large pot
    • Saute pan
    • Wooden spoon

    Method
     

    1. Preheat your oven to 425°F (220°C). Arrange the chicken thighs on a baking sheet, season with salt and pepper, and roast for about 40 minutes until the skin is golden and crispy. This step develops a deep flavor and crispiness that will add depth to your soup.
    2. While the chicken roasts, heat olive oil in a large pot over medium heat. Add sliced onions and cook, stirring occasionally, until they turn caramel brown and smell sweet, about 15-20 minutes. This caramelization adds sweetness and richness to the broth.
    3. Add minced garlic, diced carrots, and celery to the caramelized onions. Cook for another 5 minutes until fragrant and vegetables start to soften. Stir frequently to prevent sticking and promote even cooking.
    4. Once the chicken thighs are done, remove from the oven and let rest for a few minutes. Meanwhile, pour chicken broth into the pot with the vegetables, scraping up any browned bits from the bottom to deepen the flavor. Add thyme and bring the broth to a simmer.
    5. Skim the skin from the roasted chicken thighs if desired, then shred the meat off the bones using two forks. Add the shredded chicken to the simmering broth. Continue cooking on low heat for 10 minutes to meld flavors.
    6. Meanwhile, cook the egg noodles separately in boiling salted water according to package instructions until just al dente. Drain and set aside.
    7. Add the cooked noodles into the soup pot, stirring gently to combine. Let everything simmer together for another 3-5 minutes to absorb the flavors and warm the noodles.
    8. Taste the broth and adjust salt and pepper as needed. Remove from heat and serve the soup hot, garnished with crispy chicken bits if desired for added texture.

    Notes

    For a more intense flavor, let the broth sit with roasted vegetables for an hour before adding noodles. You can also add fresh herbs or a squeeze of lemon for brightness.

    This recipe is perfect for those busy evenings when you crave comfort but also want to feel something exciting in every bite. The slow roasting, the aromatic herbs, and the tender noodles create a harmony that’s both familiar and refreshingly new. It’s a reminder that even old favorites can surprise us with a little creativity.

    Sharing this soup offers a cozy touch in the midst of chilly days, but it’s also a way to slow down and appreciate the art of simple cooking. No matter how many bowls you’ve slurped in the past, this version invites a fresh appreciation—and maybe a new tradition, too.

  • Spooktacular Spider Web Cake: A Creepy Confection to Celebrate Halloween

    Spooktacular Spider Web Cake: A Creepy Confection to Celebrate Halloween

    Every October, I find myself craving something more than just the usual pumpkin pie or caramel apples.
    This year, I decided to push my baking boundaries and create a show-stopping Halloween dessert that combines artistry with a touch of spooky elegance.
    The Spider Web Cake not only looks haunting but also offers a delightful, moist crumb layered with rich flavors that evoke the eerie season.

    What makes this cake truly captivating is the intricate web design, painstakingly made with contrasting icing.
    Perfect for a Halloween gathering, it turns a simple cake into a mysterious, edible piece of art.
    Plus, the process of decorating becomes a fun, chaotic activity—perfect for embracing the spirit of Halloween.

    Spider Web Cake

    The Spider Web Cake is a moist layered cake decorated with an intricate web pattern made from contrasting icing, creating a spooky yet elegant Halloween dessert. It features a tender crumb with rich flavors, and its web design is crafted with precision to resemble a spooky spider’s web, making it a striking centerpiece. The decoration process adds a fun, chaotic element perfect for Halloween celebrations.
    Prep Time 30 minutes
    Cook Time 35 minutes
    Total Time 1 hour 5 minutes
    Servings: 8
    Course: Main Course
    Cuisine: Halloween
    Calories: 480

    Ingredients
      

    • 2 1/2 cups all-purpose flour sifted
    • 2 1/2 cups granulated sugar
    • 2 cups powdered sugar
    • 1/4 cup heavy cream for icing consistency
    • 1 tablespoon black food coloring

    Equipment

    • Mixing bowls
    • Electric mixer
    • Round cake pans
    • Cooling rack
    • Piping bags
    • Fine tips for piping
    • Offset spatula

    Method
     

    1. Preheat your oven to 350°F (175°C). Grease and flour two round cake pans to ensure the cakes release easily after baking.
    2. In a large mixing bowl, combine the sifted flour and sugar. Add the softened butter and beat with an electric mixer on medium speed until the mixture is light and fluffy, about 3-4 minutes. This creates the base for your cake batter.
    3. One at a time, add the eggs to the mixture, beating well after each addition. This helps incorporate air for a tender crumb.
    4. Mix in the vanilla extract. Then, alternately add the buttermilk and dry ingredients, starting and ending with the dry. Mix just until combined after each addition to keep the batter smooth.
    5. Divide the batter evenly between the prepared cake pans and smooth the tops with an offset spatula. Bake for about 30-35 minutes, or until a toothpick inserted into the center comes out clean. Let the cakes cool in their pans for 10 minutes, then transfer to a wire rack to cool completely.
    6. While the cakes cool, prepare the black icing. In a mixing bowl, beat the powdered sugar with heavy cream until smooth and spreadable. Mix in the black food coloring gradually until you achieve a deep black shade suitable for piping.
    7. Once the cakes are fully cooled, place one layer on your serving plate. Spread a generous layer of icing over the top with an offset spatula, then add the second cake layer on top and frost the entire cake evenly.
    8. Fill a piping bag fitted with a fine tip with the black icing. Start piping a web pattern from the center of the cake outward in concentric circles. Then, draw straight lines from the center to the edges, creating a spider web effect.
    9. Refine your web design by touching up any uneven lines or gaps with additional icing. Take your time to make the web as intricate and symmetrical as possible for a spooky, haunted look.
    10. Once the web pattern is complete, chill the cake for 15-20 minutes in the refrigerator to set the icing. This makes the web stand out and prevents smudging during serving.
    11. Slice the cake carefully to reveal the moist layers and striking web decoration. Serve slices to enjoy the rich flavor and spooky presentation.

    This Spider Web Cake is more than just a dessert; it’s a conversation starter and a perfect centerpiece for October festivities.
    The texture of the moist cake combined with the glossy, web-like frosting creates an unforgettable experience. Plus, its design allows for a fun, creative chaos that makes Halloween decorating even more memorable.

    As the spooky season winds down, this cake stands as a playful reminder of the joys of baking and creating. It captures both the eerie charm and the sweet nostalgia of childhood Halloweens while offering a touch of grown-up decadence. It’s a celebration of the season, served on a plate.

  • A Tropical Twist: The Art of Champagne Mango Slushie

    A Tropical Twist: The Art of Champagne Mango Slushie

    Imagine a summer afternoon where the air is thick with the scent of ripe mangoes and a gentle breeze brings a cool relief. That’s the magic of a mango slushie made with the king of fruits—champagne mangoes—whose sweetness and velvety texture turn an ordinary drink into a vivid, sensory celebration. This recipe is a love letter to those who crave a refreshment that’s both sweet and sophisticated, yet incredibly easy to whip up.

    Over the years, I’ve discovered that the secret to a perfect mango slushie is balancing the fruit’s natural richness with just enough ice and a splash of citrus to awaken your palate. The silky, icy blend melts smoothly on your tongue, releasing bursts of tropical aroma with every sip. It’s a delightful antidote to hot days, a nostalgic nod to childhood frozen treats, or a fun twist for cocktail nights.

    ## WHY I LOVE THIS RECIPE?
    – It captures the lush, fragrant sweetness of champagne mangoes, elevating a simple slushie to a mini feast.
    – The process is quick, forgiving, and flexible—perfect for spontaneous summer moments.
    – I love how the fresh mango aroma fills my kitchen, making every step feel like a tropical escape.
    – It’s a versatile base that can include a splash of rum or a squeeze of lime for extra flair.

    ## AVOID MY DISASTER (You’re Welcome)
    – FORGOT to freeze the mango chunks overnight; they melt too fast, resulting in a watery slushie. Freeze ahead!
    – DUMPED too much ice at once; it overpowered the fruit flavor. Add gradually for perfect texture.
    – OVER‑TORCHED the mango; the high heat dried out the flesh, dulling the natural sweetness. Use fresh, ripe mangoes only.
    – MISSED blending long enough; chunky bits ruin the smoothness. Pulse until silky, about 30 seconds.

    ## QUICK FIXES THAT SAVE YOUR DAY
    – If the slushie is too watery, SPLASH with a little extra mango or citrus juice.
    – When the texture is off, PATCH with more frozen mango or ice cubes.
    – If the flavor is dull, SHIELD with a splash of vanilla extract or a dash of chili powder.
    – When a quick refresh is needed, BLEND in fresh mint leaves for a cooling aroma.
    – When in doubt, SMELL the mango—ripe and fragrant means perfect for blending.

    The simplicity of this mango slushie makes it a go-to refreshment when the season’s heat becomes relentless. Its bright flavor invites a tropical escape that feels both indulgent and effortless. Whether served at brunch, enjoyed as a cooling treat, or used as a creative cocktail base, this recipe is your summer’s best-kept secret.

    Craving the taste of those lush mangoes without the fuss? This slushie comes together in minutes, leaving you with a vibrant, icy delight. Plus, it’s adaptable and forgiving—ideal for experimenting with flavors or adjusting to what you have in the pantry. Cheers to simple, joyful, and delicious summer sips.

    Mango Slushie

    A mango slushie is a refreshing frozen beverage made by blending ripe champagne mangoes with ice and citrus juice. The mixture results in a smooth, icy drink with a vibrant color and a luscious, velvety texture. It is perfect for hot days and has a tropical, fragrant aroma.
    Prep Time 10 minutes
    Total Time 10 minutes
    Servings: 2
    Course: Main Course
    Cuisine: Tropical
    Calories: 150

    Ingredients
      

    • 2 cups ripe champagne mango chunks frozen for best results
    • 0.5 cup fresh citrus juice lime or lemon juice preferred
    • 1 cup ice cubes adjust to desired thickness
    • 1 tablespoon honey or simple syrup optional for added sweetness

    Equipment

    • Blender
    • Cutting board

    Method
     

    1. Gather your ripe champagne mango chunks and ensure they are frozen solid to achieve a thick, slushy texture.
    2. Pour the mango chunks into your blender.
    3. Add the fresh citrus juice to the blender, which will help brighten the flavor and add a tangy contrast to the sweet mangoes.
    4. Toss in the ice cubes, which will be blended into the fruit to create a icy, slushie consistency.
    5. If desired, drizzle in honey or simple syrup to enhance sweetness and balance the tartness.
    6. Secure the lid on the blender and blend on high speed for about 30-40 seconds, until the mixture is smooth, creamy, and icy, with no large chunks remaining.
    7. Stop the blender and check the texture; it should be thick and frosty, with a velvety appearance. If it’s too thick, add a splash more citrus juice or a bit of water and blend briefly again.
    8. Pour the freshly blended mango slushie into glasses, allowing the icy mixture to settle evenly.
    9. Serve immediately, garnished with a slice of mango or a sprig of mint if desired, and enjoy the vibrant, tropical flavors.

    Notes

    Use frozen mango chunks for the best texture. Adjust lime juice and honey to suit your taste preferences. Serve immediately for a refreshingly cold experience.
    There’s something about the simple act of blending icy mango chunks that signals a moment of pure joy. It’s a reminder of lazy afternoons and warm breezes, a cool contrast to the busy rhythm of daily life. Every sip resonates with the luscious aroma and velvety texture that only ripe mangoes can give.

    As the season shifts and we look for small pleasures, this mango slushie feels like a gentle retreat. It’s more than just a drink—it’s an experience of vivid sunshine, sweet nostalgia, and cooling relief. A perfect little ritual to carry us through the hottest days, one icy spoonful at a time.

  • Spooky Sweet Bell Pepper Jack-o’-Lanterns for Halloween

    Spooky Sweet Bell Pepper Jack-o’-Lanterns for Halloween

    Halloween is the perfect time to get creative in the kitchen, but I love turning the traditional into the unexpected. These stuffed bell peppers, carved into cheerful jack-o’-lanterns, combine playful presentation with savory flavors in a way that delights both kids and adults.

    The smell of roasted peppers mingled with melting cheese fills the air, creating a cozy, festive atmosphere. It’s a project that feels nostalgic yet fresh—perfect for a gathering that’s equal parts fun and flavorful. Plus, the vibrant orange of the peppers screams Halloween with every bright, inviting glow.

    Stuffed Jack-o’-Lantern Bell Peppers

    This dish features bell peppers carved into cheerful jack-o’-lantern shapes, then filled with a savory mixture of cooked rice, seasoned ground meat, vegetables, and cheese. The peppers are roasted until tender and the cheese is melted, resulting in a colorful, festive presentation with a warm, meaty filling and a slightly crispy top.
    Prep Time 20 minutes
    Cook Time 30 minutes
    Total Time 50 minutes
    Servings: 4
    Course: Main Course
    Cuisine: American
    Calories: 350

    Ingredients
      

    • 4 large bell peppers preferably orange for Halloween theme
    • 1 cup cooked rice white or brown, cooked and cooled
    • 1/2 pound ground meat beef, turkey, or chicken
    • 1 small onion finely chopped
    • 2 cloves garlic minced
    • 1 cup cheese shredded cheese cheddar or similar
    • 2 tbsp olive oil olive oil
    • to taste salt and pepper

    Equipment

    • Baking sheet
    • Sharp knife
    • Cutting board
    • Mixing bowls
    • Spoon or spatula

    Method
     

    1. Preheat your oven to 400°F (200°C). Slice the tops off the bell peppers and carefully carve Jack-o’-lantern faces into each, creating cheerful, pumpkin-like expressions. Remove seeds and set aside.
    2. Heat olive oil in a skillet over medium heat. Add chopped onion and minced garlic, sautéing until fragrant and translucent, about 3-4 minutes. This fills the kitchen with a warm aroma.
    3. Add ground meat to the skillet, breaking it apart with a spoon, and cook until browned and cooked through, about 5-7 minutes. Season with salt and pepper to taste.
    4. Stir in the cooked rice to the meat mixture, combining everything evenly. Cook for another 2 minutes to meld the flavors.
    5. Spoon the savory filling into each carved pepper, pressing gently to fill completely and ensure the mixture stays inside during roasting.
    6. Place the stuffed peppers on a baking sheet and sprinkle shredded cheese over the top of each. Position the pepper tops back in place if desired.
    7. Bake in the preheated oven for 20-25 minutes, or until the peppers are tender and the cheese is melted and bubbly with a slight golden-brown color.
    8. Remove from the oven and let cool slightly before serving. The peppers will have a vibrant orange color with melted cheese on top, ready to be enjoyed.
    In the end, these stuffed pepper jack-o’-lanterns are more than just food—they’re a conversational piece and a perfect way to embrace the season’s whimsy. Watching guests laugh and marvel at your edible pumpkins makes all the effort worthwhile.

    And after the trick-or-treat chaos, they serve as a simple, satisfying meal that captures the spirit of Halloween. The blend of roasted smell, savory filling, and cheerful faces makes this dish memorable and heartwarming for everyone around the table.

  • Brighten Your Fall Table with Roasted Butternut Squash Soup

    Brighten Your Fall Table with Roasted Butternut Squash Soup

    As the leaves turn and a chill sneaks into the air, there’s a particular comfort in a warm bowl of soup. But this isn’t just any soup—it’s a roasted butternut squash version that transforms simple ingredients into a silky, flavorful experience. I love peeling back the tough exterior to reveal the gem inside, then roasting until the aroma is irresistible.

    What makes this recipe stand out is how easy it is to elevate. The roasting process adds a depth of sweetness and smokiness that blends perfectly with a touch of spice. It’s my go-to because it feels like a cozy sweater — familiar, yet surprisingly special every time.

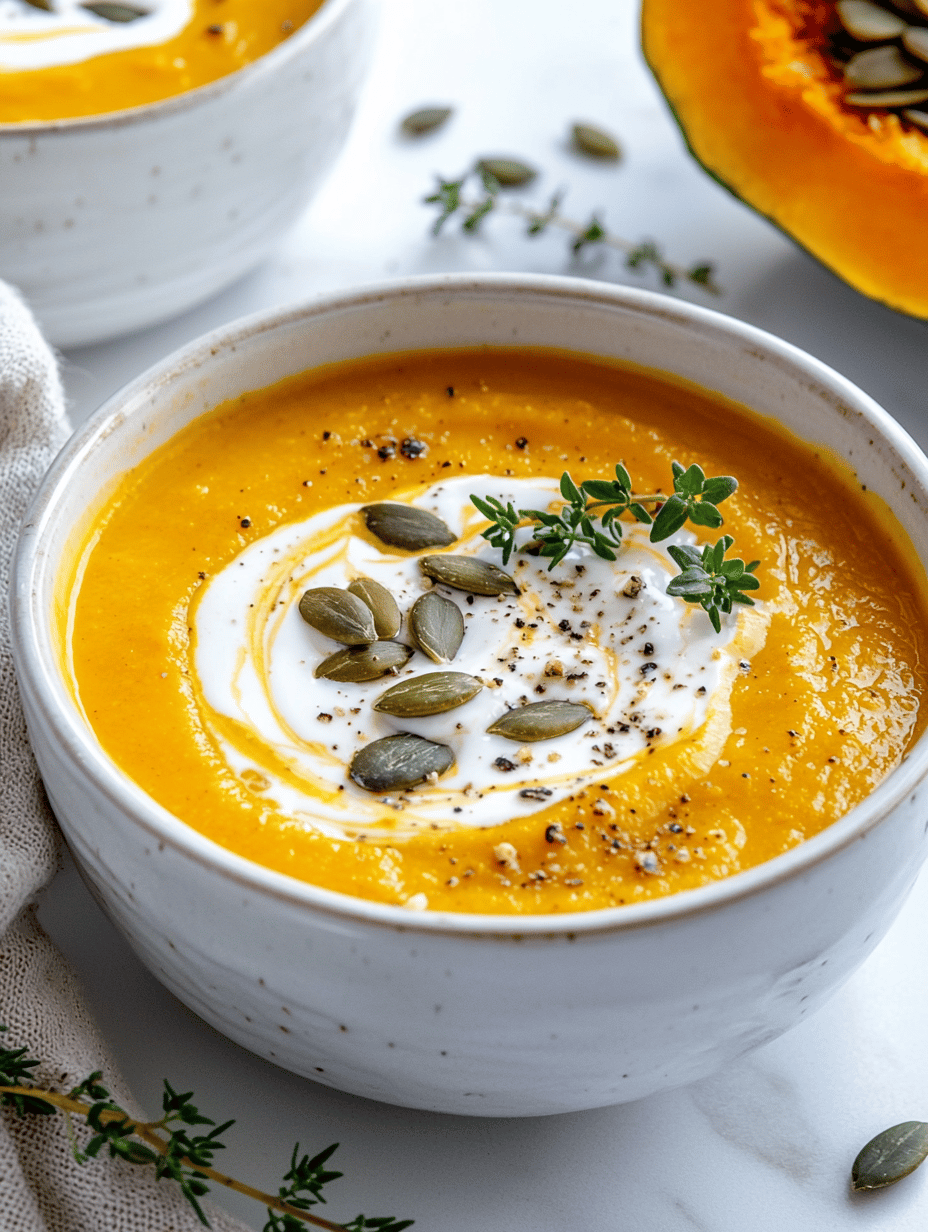
    Roasted Butternut Squash Soup

    This soup features roasted butternut squash blended into a smooth, velvety puree. The roasting process enhances the natural sweetness and adds a smoky depth, resulting in a rich, comforting bowl with a silky consistency and vibrant orange color.
    Prep Time 15 minutes
    Cook Time 45 minutes
    Total Time 1 hour
    Servings: 4
    Course: Main Course
    Cuisine: Comfort Food
    Calories: 250

    Ingredients
      

    • 1 large butternut squash peeled, seeded, and cut into chunks
    • 2 tablespoons olive oil for roasting and sautéing
    • 1 medium yellow onion chopped
    • 2 cloves garlic minced
    • 4 cups vegetable broth or chicken broth
    • 1/2 teaspoon smoked paprika optional, for depth
    • to taste salt and pepper for seasoning

    Equipment

    • Baking sheet
    • Blender or immersion blender
    • Sharp knife
    • Cutting board
    • Soup pot

    Method
     

    1. Preheat your oven to 400°F (200°C) and line a baking sheet with parchment paper.
    2. Peel the butternut squash, scoop out the seeds, and cut it into evenly-sized chunks.
    3. Toss the squash chunks with 1 tablespoon of olive oil, then spread them out on the prepared baking sheet.
    4. Roast the squash in the oven for about 30-35 minutes, until they are golden and slightly caramelized around the edges.
    5. Meanwhile, heat the remaining 1 tablespoon of olive oil in a large soup pot over medium heat.
    6. Add the chopped onion to the pot and sauté until translucent and fragrant, about 5 minutes.
    7. Add the minced garlic and cook for another 1 minute, until fragrant but not browned.
    8. Once the squash is roasted and cool enough to handle, add it to the pot with the sautéed onions and garlic.
    9. Pour in the vegetable broth, then bring the mixture to a gentle simmer and cook for 10 minutes to allow flavors to meld.
    10. Use an immersion blender or transfer the soup to a blender to blend until smooth and creamy.
    11. Return the blended soup to the pot, stir in smoked paprika (if using), and season with salt and pepper to taste.
    12. Let the soup simmer for another 5 minutes to warm through and allow flavors to deepen.
    13. Serve the soup hot, garnished with your favorite toppings like a drizzle of olive oil, toasted seeds, or fresh herbs.

    This roasted butternut squash soup is a simple way to bring seasonal richness to your table. Its smooth texture and warm spices make it perfect for chilly evenings or lazy weekends. Plus, the roasting aroma alone is worth taking the time for.

    Whether you’re looking to impress guests or just treat yourself, this recipe is a keeper. The ingredients work harmoniously, creating a dish that feels both hearty and elegant. Every spoonful is a little reminder of the beauty in simple, seasonal ingredients.